
How to Create Real-Time User Profiles with Convex and Clerk
This article is part of our 4-part series that covers the steps to build a fully functional app using Convex and Expo.
- User Authentication with Clerk and Convex
- Real-Time User Profiles with Convex and Clerk (You are here)
- Implementing Real-Time AI Chat with Convex
- Automating Content with Convex Cron and ChatGPT
In the previous article in this series, we explored how to integrate Clerk and Convex to manage authentication screens in an Expo environment. Convex provides real-time database and file storage, while Clerk offers robust authentication management features. In this article, I’ll demonstrate how to combine these two tools to implement user profile updates and manage data in real-time.
This article is intended for developers who need real-time database and user authentication functionality in a React Native or Expo environment. Specifically, if you’re new to Convex and Clerk, this guide will teach you how to:
- Write and read data from Convex's real-time database
- Link Clerk's authentication system with Convex's data layer
- Handle file uploads for profile images
- Implement automatic UI updates using Convex's reactive data system
The current workshop records are available in https://github.com/hyochan/convex-expo-workshop/pull/3.
Why Convex and Clerk?
Convex offers a real-time database that's ideal for managing dynamic data such as user profiles. Since data updates in real time, any changes made by users are instantly reflected in the UI without needing a page refresh. It also provides ACID transactions to ensure data consistency during concurrent updates, and its schema flexibility allows for rapid development without requiring upfront schema definitions. Additionally, Convex's file storage makes it easy to upload and handle media files, such as profile pictures, which is extremely useful for apps that require media handling.
Clerk simplifies complex user authentication logic. It supports social logins, email authentication, and unique user ID management with ease. When combined with Convex, Clerk’s user IDs provide a more secure way to manage user data.
By using these two tools together, developers can implement complex authentication and data management workflows with ease while also enhancing the user experience. It also allow you to focus on building features rather than managing authentication state or implementing real-time synchronization logic.
Implementation Steps
Now, let's explore how to manage user profiles by integrating Convex and Clerk. In the following step-by-step guide, I’ll explain why each feature is necessary and why the chosen methods are used.
- Writing Data to the Convex Database
- Convex's
mutationfunction is used to create new users and update profiles. - Updates are automatically synchronized across all clients without requiring manual state management.
- Convex's
- Linking Clerk's Unique User ID with Convex
- Clerk provides a unique user ID, which is mapped to Convex to securely manage user profile information.
- This allows users to easily update their profiles and view their information in real time, from anywhere.
- Uploading Image Files
- Convex’s file storage is used to securely store the images uploaded by users.
- The images are then linked to the user’s profile using temporary secure URLs that Convex manages automatically.
- Defining Schema
- Convex allows schema definition later in the development process, supporting faster development. The schema can be gradually added as needed while building the app, aligning with a philosophy similar to GraphQL’s flexible data model.
Convex Database
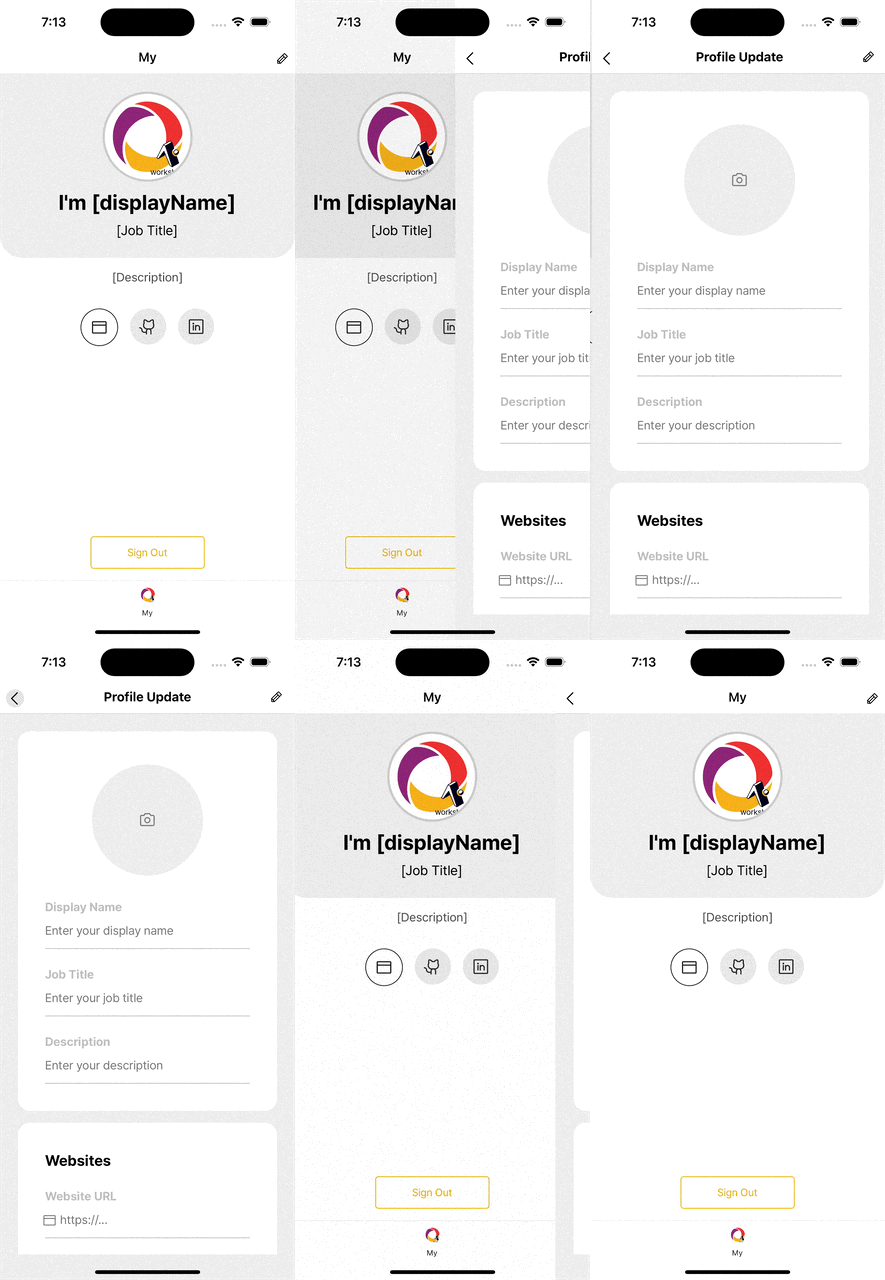
Now that we have our profile UI screen ready, let's implement writing profile data to the Convex Database.
1. Writing Data
First, refer to the Convex official documentation on Inserting new documents.
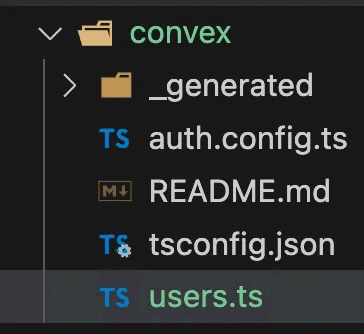
Create a convex/users.ts file.
Then, implement the APIs related to user management. Let's start by implementing a function to create a user, as shown below.
Create the createUser API in the users.ts file as shown below:
1import {mutation} from './_generated/server';
2import {v} from 'convex/values';
3
4export const createUser = mutation({
5  args: v.object({
6    displayName: v.string(),
7    jobTitle: v.string(),
8    description: v.string(),
9    websiteUrl: v.string(),
10    githubUrl: v.string(),
11    linkedInUrl: v.string(),
12  }),
13  handler: async (ctx, args) => {
14    const userId = await ctx.db.insert('users', {
15      ...args,
16    });
17
18    console.log('User ID:', userId);
19  },
20});
21
This mutation will insert a new user document into the database. Convex automatically generates a unique ID for each document and handles the data synchronization across all connected clients.
Next, in profile-update.tsx, import the API created in Convex and call it using the useMutation function. Then, use this mutation within the handleUpdate function as shown below:
1+ import { api } from '@/convex/_generated/api';
2
3...
4
5export default function ProfileUpdate(): JSX.Element {
6  const { back } = useRouter();
7  const { user } = useUser();
8  const { theme } = useDooboo();
9+ const createUser = useMutation(api.users.createUser);
10
11...
12
13+  const handleUpdate = async (data: ProfileFormData) => {
14+    await createUser(data);
15+  };
16
17
In this code:
- You import the API using
useMutation. - The
handleUpdatefunction calls thecreateUsermutation to send user data to the Convex database when a user updates their profile.
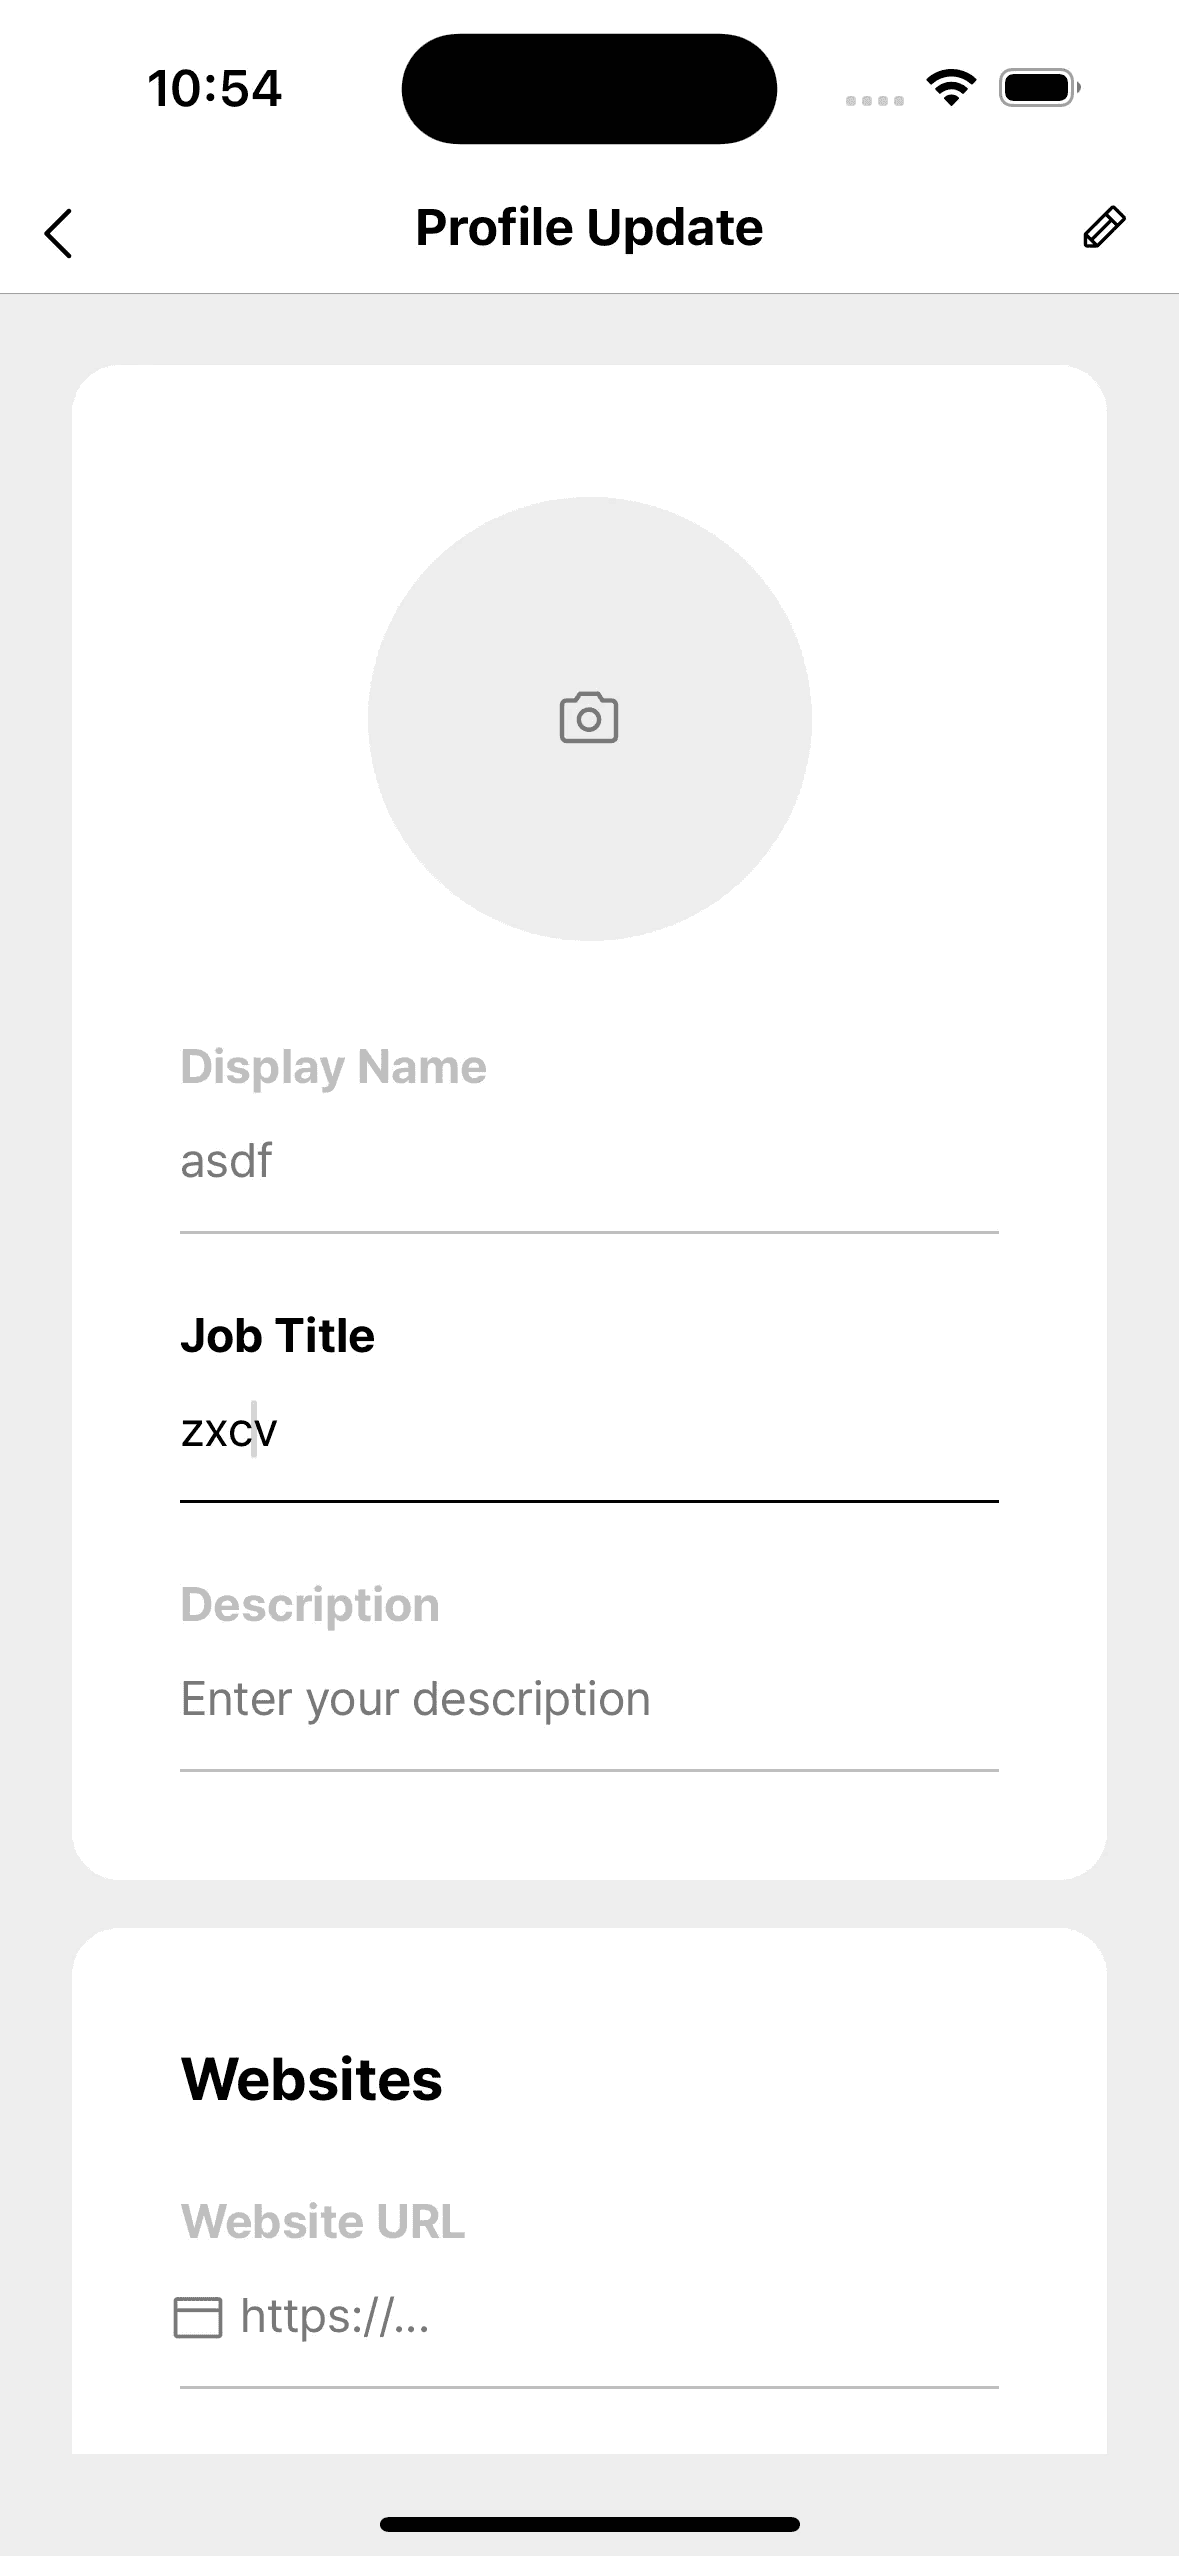
Then, return to the screen, enter the information as shown, and tap the pencil icon at the top right.

You should see the logs being printed as shown, confirming that the data has been successfully inserted into the Convex database.
Now, go back to the Convex dashboard, and you should see the data you just entered displayed as shown. This confirms that the data has been successfully stored in the Convex database.

On the profile update screen, if you repeatedly tap the button in the top-right corner, you'll notice that the data gets submitted multiple times.

While this code demonstrates basic database writes, it doesn't handle user identity management. To address this, we will modify the createUser API into an updateProfile API, using Clerk's identity for user identification and management.
Let’s proceed with this update and ensure that each user is uniquely managed by leveraging Clerk's user identity in the updateProfile API.
2. Managing Profile Information Using User Identity
First, let's clear the existing users table since our previous data isn't linked to Clerk's identity system. Starting fresh will ensure all new user records are properly associated with their Clerk identities.
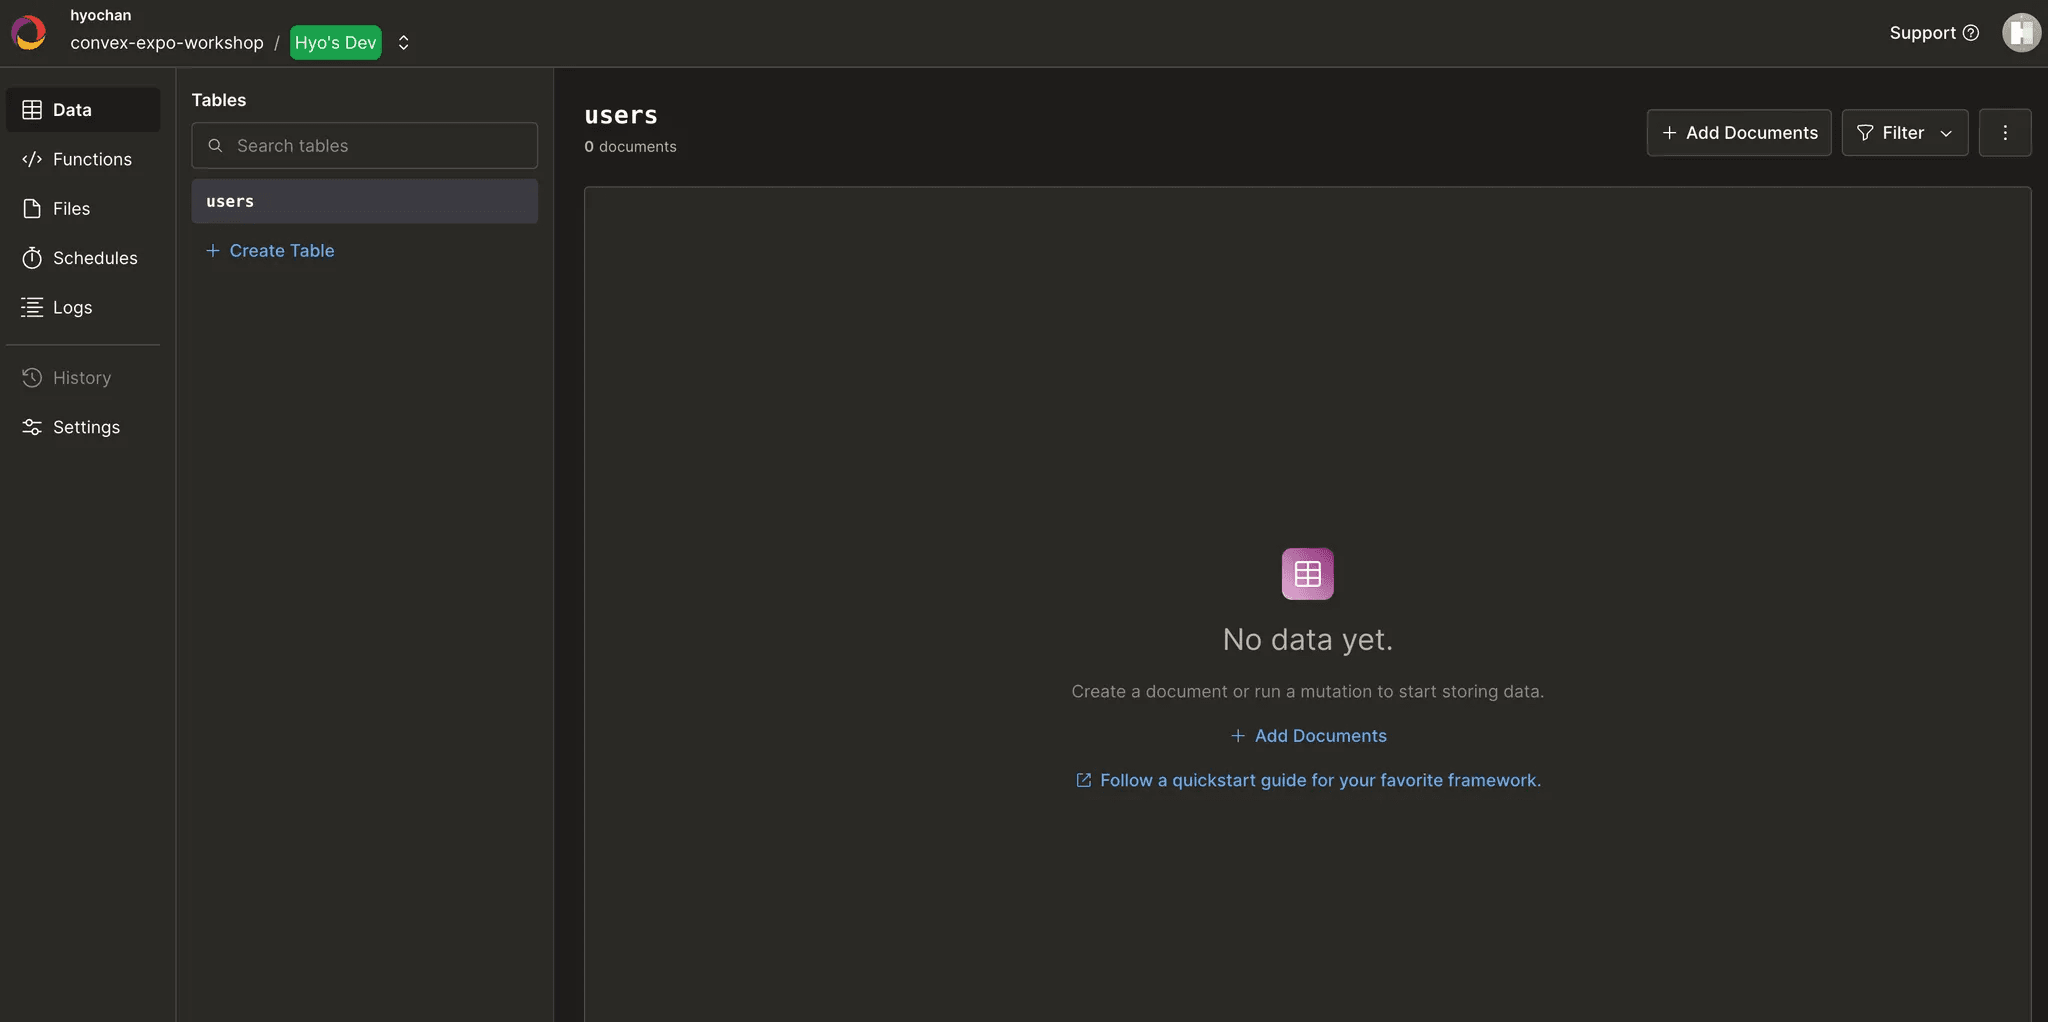
Next, refer to the Mutation for storing the current user documentation, and create the updateProfile API as follows:
1export const updateProfile = mutation({
2  args: v.object({
3    displayName: v.string(),
4    jobTitle: v.string(),
5    description: v.string(),
6    websiteUrl: v.string(),
7    githubUrl: v.string(),
8    linkedInUrl: v.string(),
9  }),
10  handler: async (ctx, args) => {
11    const identity = await ctx.auth.getUserIdentity();
12    if (!identity) {
13      throw new Error('Called storeUser without authentication present');
14    }
15
16		const user = await userByExternalId(ctx, identity.tokenIdentifier);
17
18    if (user !== null) {
19      if (user.name !== identity.name) {
20        await ctx.db.patch('users', user._id, args);
21      }
22      return user._id;
23    }
24
25    return await ctx.db.insert('users', {
26      ...args,
27      tokenIdentifier: identity.tokenIdentifier,
28    });
29  },
30});
31
32export async function userByExternalId(ctx: QueryCtx, externalId: string) {
33  return await ctx.db.query('users').filter(q => q.eq('tokenIdentifier', externalId)).unique();
34}
35
In this code:
getUserIdentity()retrieves the authenticated user's identity from Clerk.- If the user already exists (based on Clerk's unique token identifier), we use
patch()to update their profile. - If the user doesn’t exist, we create a new user with
insert(), associating their profile with Clerk’s uniquetokenIdentifier.
The code above is very similar to the example provided in the documentation. The main difference is that we are not using a schema, which means we can’t apply an index, but we can address this later. For now, you can ignore this point.
The key part to note is that if the user does not exist, we use insert to create a new user, and if the user already exists, we use patch to update their profile.
Convex DB provides two commands for updates:
patch: Performs a shallow merge, allowing you to add, modify, or remove specific fields in the existing data.replace: Completely replaces the existing data, potentially deleting fields that are not present in the new data.
Now, let’s modify the handleUpdate function as follows:
1+ const updateProfile = useMutation(api.users.updateProfile);
2
3  const handleUpdate: SubmitHandler<ProfileFormData> = async (data) => {
4+   await updateProfile(data);
5  };
6
This update ensures that when the handleUpdate function is called, it triggers the updateProfile mutation to either create or update the user profile based on the current data.
Screen Recording 2024-10-04 at 1.21.52 AM.mov
You can see that instead of adding new data, the existing data is continuously updated based on a specific identifier. Now, let's modify the code so that when the update is completed, the user information is refreshed when navigating back to the previous screen.
3. Fetching User Information
Let's go back to the convex/users.ts file and write the API to fetch user information. The API will retrieve the user's profile data based on their unique identifier from Clerk.
Here's how you can implement it:
1export async function userByExternalId(ctx: QueryCtx, externalId: string) {
2  return await ctx.db
3    .query('users')
4    .filter((q) => q.eq(q.field("tokenIdentifier"), externalId))
5    .unique();
6}
7
8export const getCurrentUser = query({
9  handler: async (ctx, args) => {
10    const identity = await ctx.auth.getUserIdentity();
11    if (identity === null) {
12      return null;
13    }
14
15    return await userByExternalId(ctx, identity.subject);
16  },
17});
18
In this implementation:
userByExternalIdis a helper function that queries the Convex database to find a user by their Clerk ID (tokenIdentifier)getCurrentUseruses this helper to fetch the current user's profile after confirming their identity through Clerk- When the user isn't authenticated,
getCurrentUserreturnsnullto handle unauthenticated states safely
Next, we'll update the component in the app/(home)/(tabs)/index.tsx file to display the user's information. Here's how you can modify the component:
1+  const userLinks: {
2+    url: string | undefined;
3+    icon: IconName;
4+    color: ButtonColorType;
5+  }[] = [
6+    {url: user?.websiteUrl, icon: 'Browser', color: 'primary'},
7+    {url: user?.githubUrl, icon: 'GithubLogo', color: 'light'},
8+    {url: user?.linkedInUrl, icon: 'LinkedinLogo', color: 'light'},
9+  ];
10
11<ProfileHeader>
12  <UserAvatar source={IC_ICON} />
13+  <TitleText>I'm {user?.displayName || ''}</TitleText>
14+  <Typography.Body1>{user?.jobTitle || ''}</Typography.Body1>
15</ProfileHeader>
16<Content>
17+  <Description>{user?.description || ''}</Description>
18  <WebsitesWrapper>
19+		{userLinks
20+			.filter((link) => !!link.url) // url이 존재하는 것만 필터링
21+			.map(({url, icon, color}) => (
22+			  <IconButton
23+			    key={icon}
24+			    icon={icon}
25+			    color={color}
26+			    onPress={() => openURL(url!)}
27+			  />
28+		))}
29  </WebsitesWrapper>
30</Content>
31
Finally, let's go to the profile-update.tsx file and add the following code to set the defaultValues for the form fields, so that the form is pre-populated with the user's current data.
1  const updateProfile = useMutation(api.users.updateProfile);
2+  const user = useQuery(api.users.currentUser, {});
3
4+  const {control, handleSubmit} = useForm<ProfileFormData>({
5+    defaultValues: {
6+      displayName: user?.displayName ?? '',
7+      jobTitle: user?.jobTitle ?? '',
8+      description: user?.description ?? '',
9+      websiteUrl: user?.websiteUrl ?? '',
10+      githubUrl: user?.githubUrl ?? '',
11+      linkedInUrl: user?.linkedInUrl ?? '',
12+    },
13+  });
14defaultValues: The form is pre-filled with the current user data fetched from Convex. If any fields are not available, they are initialized as empty strings.

Then, as shown above, when you enter the profile-update screen, you can confirm that the user's information is successfully fetched and pre-filled into the form fields. This ensures that the user's current data is displayed and ready for editing when they open the profile update screen.
4. Image Upload
Next, we'll add profile image uploads using Convex File Storage. This requires two parts: using expo-image-picker to let users select images from their device, and then uploading those images to Convex Storage.
Preparing for Image Upload in Expo
-
First, install the
expo-image-pickerlibrary to allow users to pick an image from their device.1bunx expo install expo-image-picker --yarn 2 -
Wrap the image inside a
TouchableOpacityas shown below. Note thatImageTouchableis a styled-component that applies styles toTouchableOpacity:1+ const [imagePickerAsset, setImagePickerAsset] = 2+ useState<ImagePickerAsset | null>(null); 3 4... 5 6+ const image = imagePickerAsset?.uri ?? user?.avatarUrl; 7 8... 9 10+ <ImageTouchable activeOpacity={0.7} onPress={handleImagePressed}> 11 <Image 12 style={css` 13 width: 148px; 14 height: 148px; 15 border-radius: 80px; 16 background-color: ${theme.bg.paper}; 17 `} 18+. source={{uri: image}} 19 /> 20 <Icon 21 name="Camera" 22 size={24} 23 color={theme.text.placeholder} 24 style={css` 25 position: absolute; 26 align-self: center; 27 `} 28 /> 29+ </ImageTouchable> 30IThe
imagePickerAssetstate stores the selected image's metadata from expo-image-picker, including its URI, dimensions, and type. We'll use this data both for preview and upload. -
Prepare the function to handle the
onPressevent as shown below. This function will trigger the image picker when the user taps on the image, allowing them to select a picture from their device:1const handleImagePressed = async () => { 2 const {granted} = await requestMediaLibraryPermissionsAsync(); 3 4 if (granted) { 5 const image = await launchImageLibraryAsync({ 6 ...{ 7 quality: 1, 8 aspect: [1, 1], 9 mediaTypes: MediaTypeOptions.Images, 10 }, 11 }); 12 13 setImagePickerAsset(image.assets?.[0] || null); 14 } 15}; 16
After incorporating the above code, the app will be ready to allow users to upload an image, as shown on the right side. The expo-image-picker will handle the image selection, and the app will be set up to display the selected image, preparing it for upload.
Convex File Upload
-
Create the
convex/upload.tsfile and add the following code. ThegenerateUploadUrlfunction will generate a temporary URL for file uploads and return a JSON response containing a new_storageID. Optionally, you can use HTTP headers to receive asha256checksum for added security.1import {mutation} from './_generated/server'; 2 3export const generateUploadUrl = mutation(async (ctx) => { 4 return await ctx.storage.generateUploadUrl(); 5}); 6 -
Here's how you can write the API function for uploading an image to storage:
1export const sendImage = mutation({
2  args: { storageId: v.id('_storage') },
3  handler: async (ctx, args) => {
4    const identity = await ctx.auth.getUserIdentity();
5    if (!identity) {
6      throw new Error('Called sendImage without authentication present');
7    }
8
9    const user = await userByExternalId(ctx, identity.tokenIdentifier);
10    if (!user) {
11      throw new Error('User not found');
12    }
13
14    await ctx.db.insert('images', {
15      body: args.storageId,
16      author: user._id,
17      format: 'image',
18    });
19  },
20});
21
One important note about the above code is that while there is no limit on the size of the upload itself, the timeout for the file upload is set to 2 minutes. This means that if the file upload process takes longer than 2 minutes, the request will fail, and you will need to handle this scenario in your application, possibly by retrying the upload or notifying the user. Make sure to optimize your file uploads, especially for larger files, to ensure they complete within this time frame.
-
Now, return to the
profile-update.tsxscreen and use the API functions you defined by importing them and calling them via hooks. Here's how you can load the API functions into your component using hooks:1 const generateUploadUrl = useMutation(api.upload.generateUploadUrl); 2 const sendImage = useMutation(api.upload.sendImage); 3 -
Next, update the
handleUpdatefunction to upload the selected image and store theavatarUrlIdin the user's profile. Here's how you can modify the function:1const handleUpdate: SubmitHandler<ProfileFormData> = async (data) => { 2 setLoading(true); 3 4 try { 5+ let avatarUrlId: string | undefined; 6 7+ if (imagePickerAsset) { 8+ const url = await generateUploadUrl(); 9+ const response = await fetch(imagePickerAsset.uri); 10+ const blob = await response.blob(); 11 12+ const result = await fetch(url, { 13+ method: 'POST', 14+ headers: imagePickerAsset.type 15+ ? {'Content-Type': `${imagePickerAsset.type}/*`} 16+ : {}, 17+ body: blob, 18+ }); 19 20+ const {storageId} = await result.json(); 21+ await sendImage({storageId}); 22 23+ avatarUrlId = storageId; 24+ } 25 26 await updateProfile({ 27 ...data, 28+ avatarUrlId, 29 }); 30 31 back(); 32 } catch (e) { 33 console.error(e); 34 } finally { 35 setLoading(false); 36 } 37}; 38
We store avatarUrlId instead of a URL because Convex uses secure, permanent IDs for files while generating temporary URLs for access. This security feature prevents unauthorized access to uploaded files. We'll use this ID to fetch fresh URLs when needed using Convex's storage API.
-
Replace the existing
avatarUrlargument withavatarUrlId.1export const updateProfile = mutation({ 2 args: v.object({ 3 displayName: v.string(), 4 jobTitle: v.string(), 5 description: v.string(), 6 websiteUrl: v.string(), 7 githubUrl: v.string(), 8 linkedInUrl: v.string(), 9- avatarUrl: v.optional(v.string()), 10+ avatarUrlId: v.optional(v.string()), 11 }), 12 ... 13}); 14 -
Modify the
currentUserAPI function to fetchavatarUrlusingavatarUrlId:1export const currentUser = query({ 2 handler: async (ctx, args) => { 3 const identity = await ctx.auth.getUserIdentity(); 4 if (identity === null) { 5 throw new Error('Called currentUser without authentication present'); 6 } 7 8 const user = await userByExternalId(ctx, identity.tokenIdentifier); 9 if (!user) { 10 throw new Error('User not found'); 11 } 12 13+ let avatarUrl = null; 14+ if (user.avatarUrlId) { 15+ avatarUrl = await ctx.storage.getUrl(user.avatarUrlId); 16+ } 17 18 return { 19 ...user, 20+ avatarUrl, 21 }; 22 }, 23}); 24With this, the
currentUserAPI will retrieve the avatar URL dynamically, based on the storedavatarUrlId. -
Fetch
user.avatarUrlin the/app/(home)/(tabs)/index.tsxfile.1<UserAvatar 2 source={user?.avatarUrl ? {uri: user.avatarUrl} : IC_ICON} 3/> 4
By updating the code as shown, you can confirm that the profile image is successfully updated 🎉.
5. Managing Schema
So far, while developing the functionality to update the user profile, we haven't defined any schema. Now, let's explore how to define the User schema to ensure more robust data types and structure.
By defining a schema, you can enforce stricter data validation, ensure data integrity, and make future updates to the user data model easier to manage. Here's how you can implement the user schema for this purpose.
Create the convex/schema.ts file with the following structure:
1import { defineSchema, defineTable } from "convex/server";
2import { v } from "convex/values";
3
4export default defineSchema({
5  users: defineTable({
6    avatarUrlId: v.id("_storage"),
7    description: v.string(),
8    displayName: v.string(),
9    githubUrl: v.string(),
10    jobTitle: v.string(),
11    linkedInUrl: v.string(),
12    tokenIdentifier: v.string(),
13    websiteUrl: v.string(),
14  }),
15});
16
The above code can be easily copied and pasted from the Convex Dashboard. In the dashboard, you can open the Schema and Indexes section from the top-right corner of the table to view the current schema configuration as code. This allows you to manage and refine your schema directly, ensuring your data structure aligns with the application's requirements.
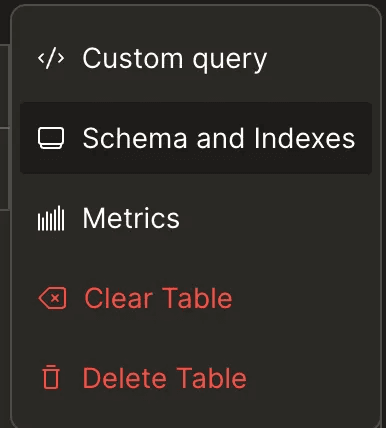
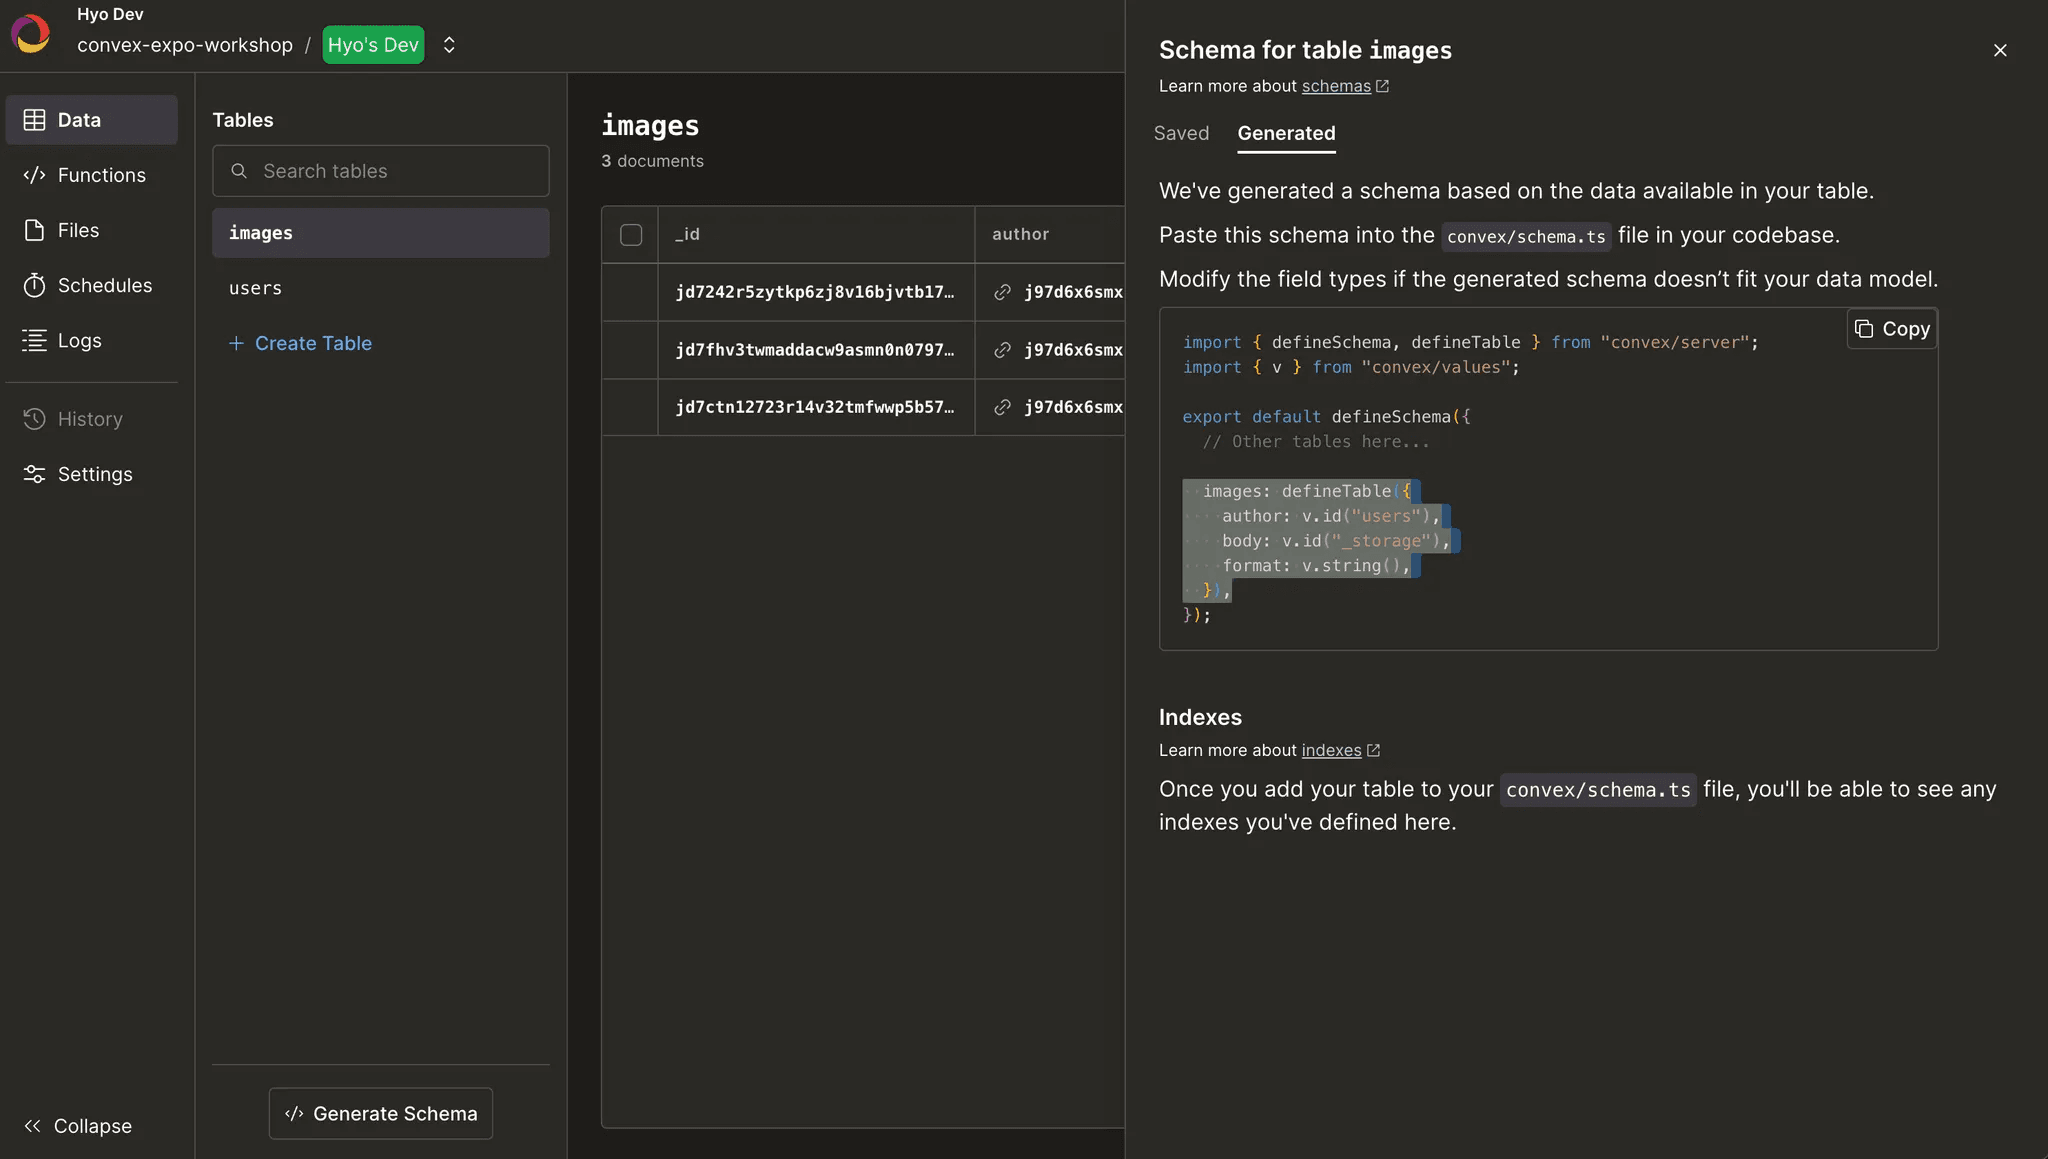
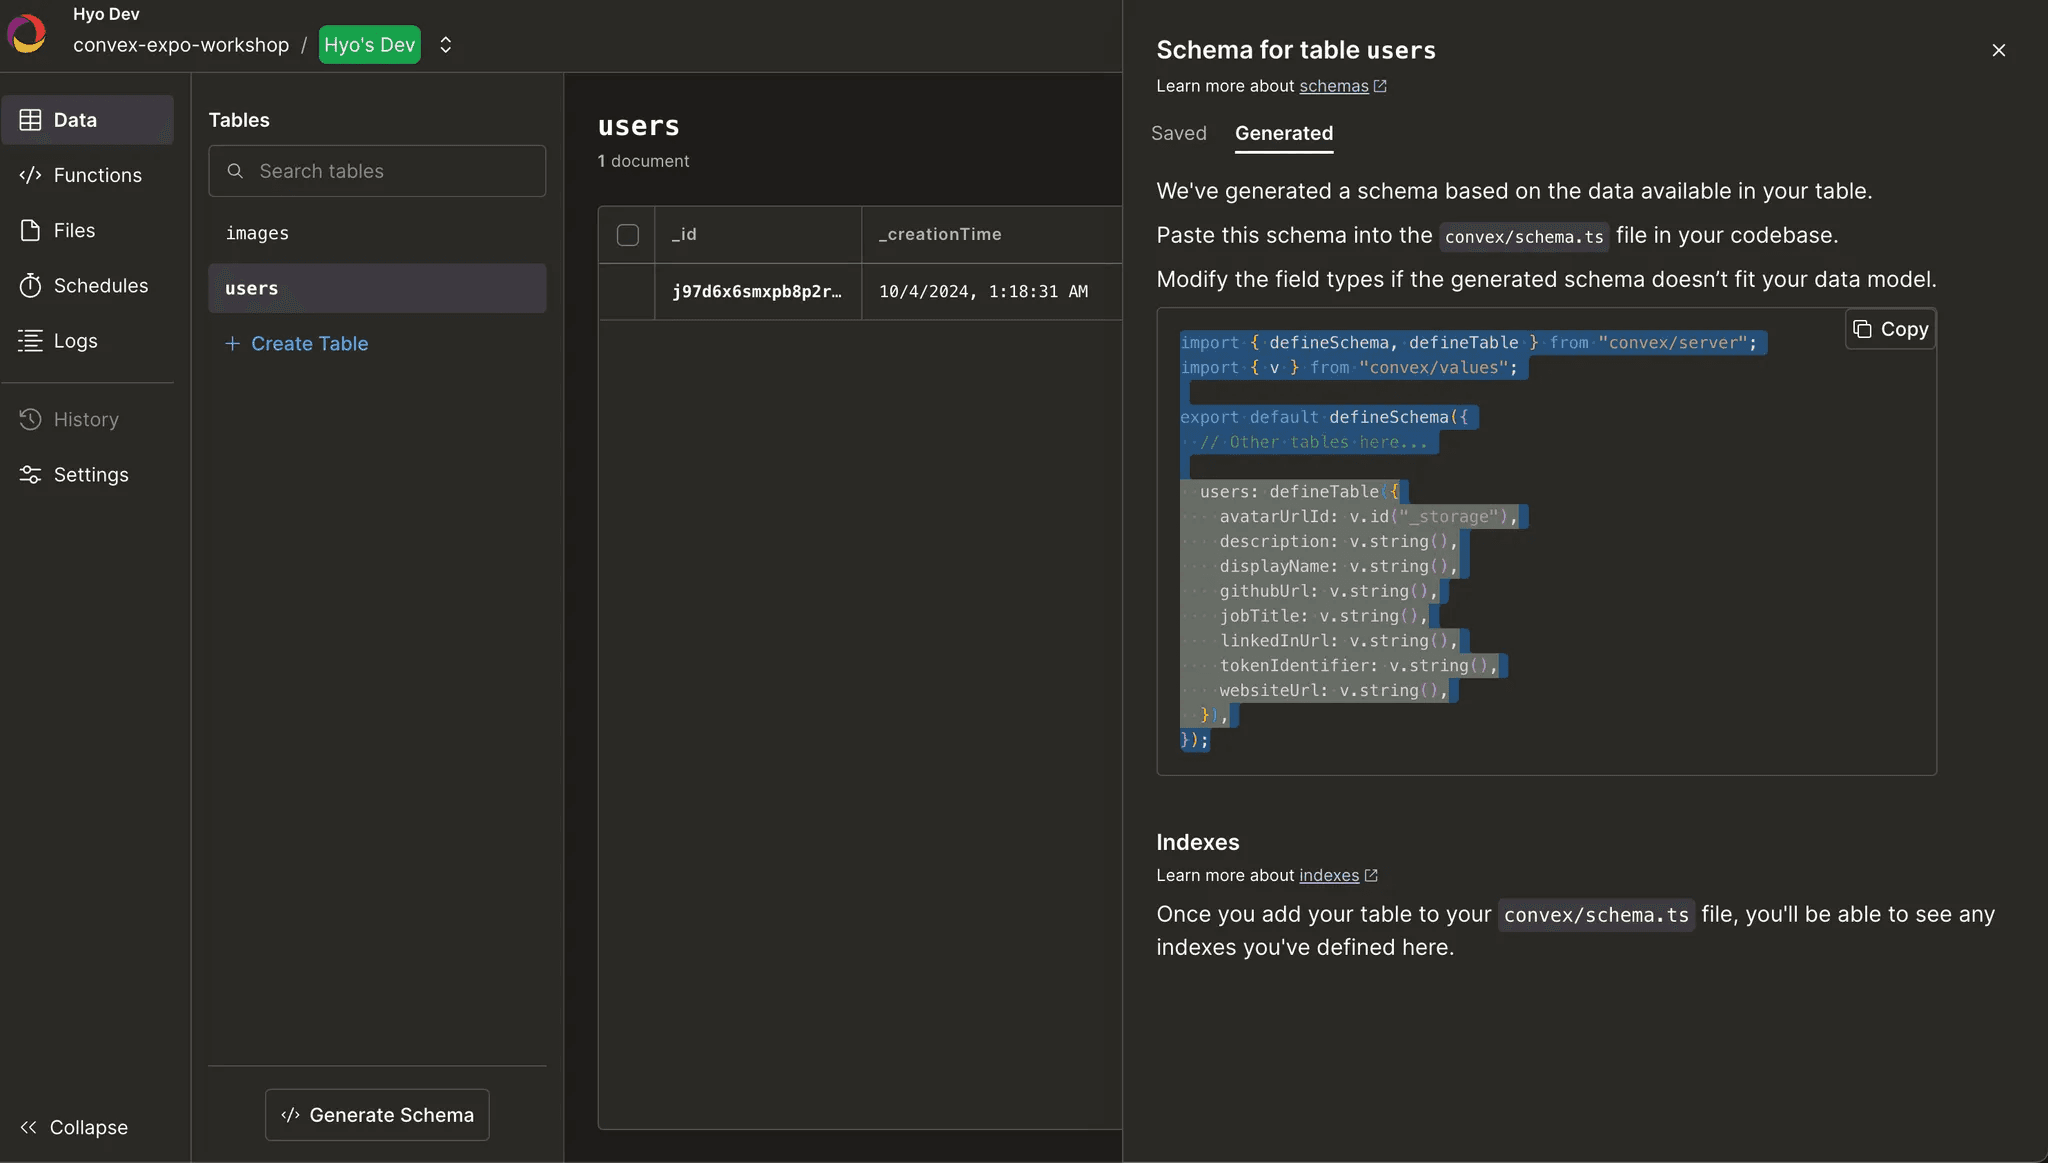 Similarly, you can retrieve the schema code for the
 images table.
Here’s the final schema code that you should write:
1import { defineSchema, defineTable } from "convex/server";
2import { v } from "convex/values";
3
4export default defineSchema({
5  users: defineTable({
6    avatarUrlId: v.id("_storage"),
7    description: v.string(),
8    displayName: v.string(),
9    githubUrl: v.string(),
10    jobTitle: v.string(),
11    linkedInUrl: v.string(),
12    tokenIdentifier: v.string(),
13    websiteUrl: v.string(),
14  }),
15  images: defineTable({
16    author: v.id("users"),
17    body: v.id("_storage"),
18    format: v.string(),
19  }),
20});
21
After adding the schema, you might see TypeScript errors because Convex now enforces strict types based on your schema definition:
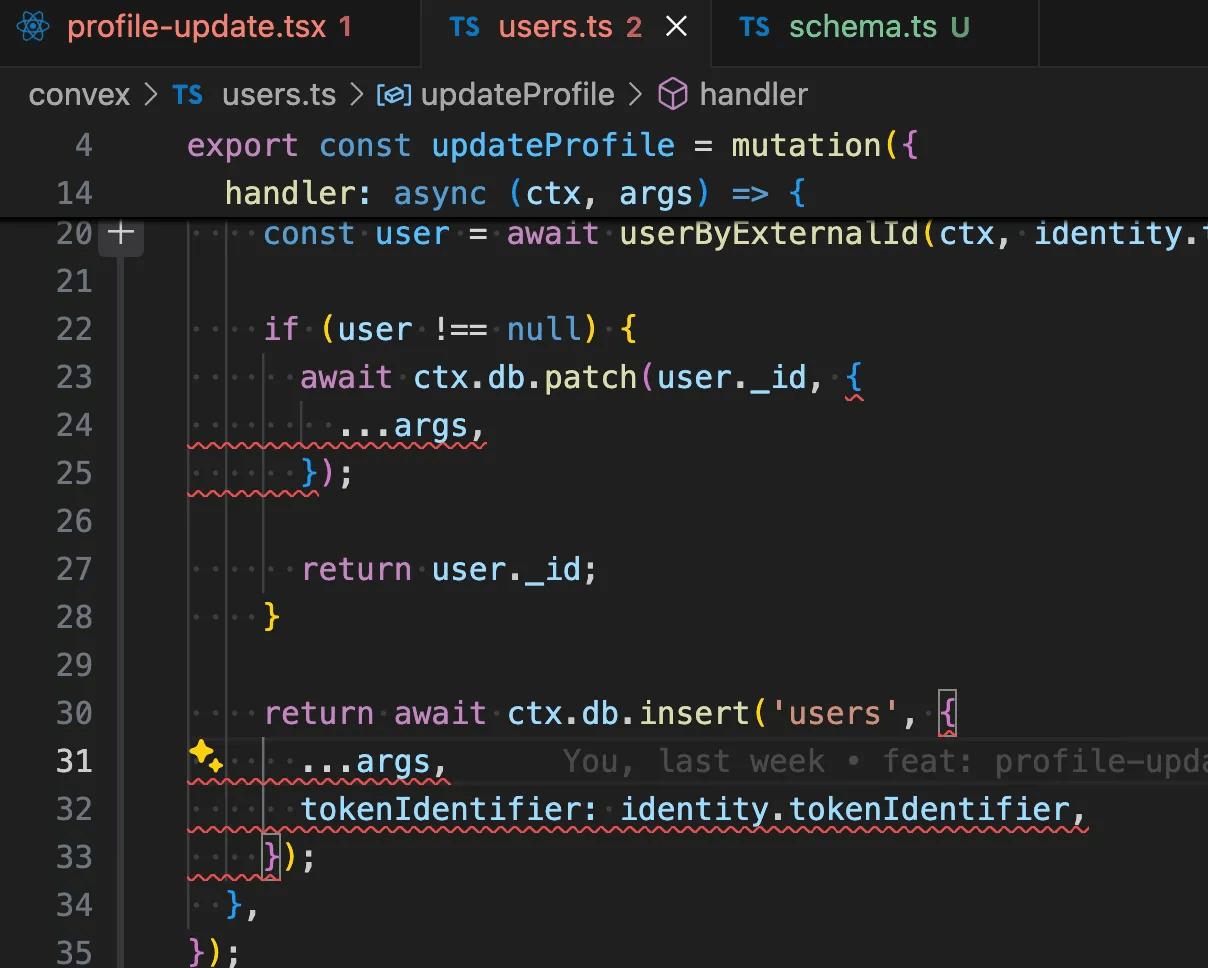
In our case, we need to mark some fields as optional using v.optional() to match how our data is actually structured. By modifying the schema as shown below, you can resolve the TypeScript errors:
1export default defineSchema({
2  users: defineTable({
3    displayName: v.string(),
4    tokenIdentifier: v.string(),
5    description: v.optional(v.string()),
6    avatarUrlId: v.optional(v.id("_storage")),
7    githubUrl: v.optional(v.string()),
8    jobTitle: v.optional(v.string()),
9    linkedInUrl: v.optional(v.string()),
10    websiteUrl: v.optional(v.string()),
11  }),
12});
13
Additionally, before defining the schema, the types were marked as any, and type autocompletion was not functioning properly. However, after defining the schema, you can see that the type autocompletion works well, providing clear and precise type suggestions.
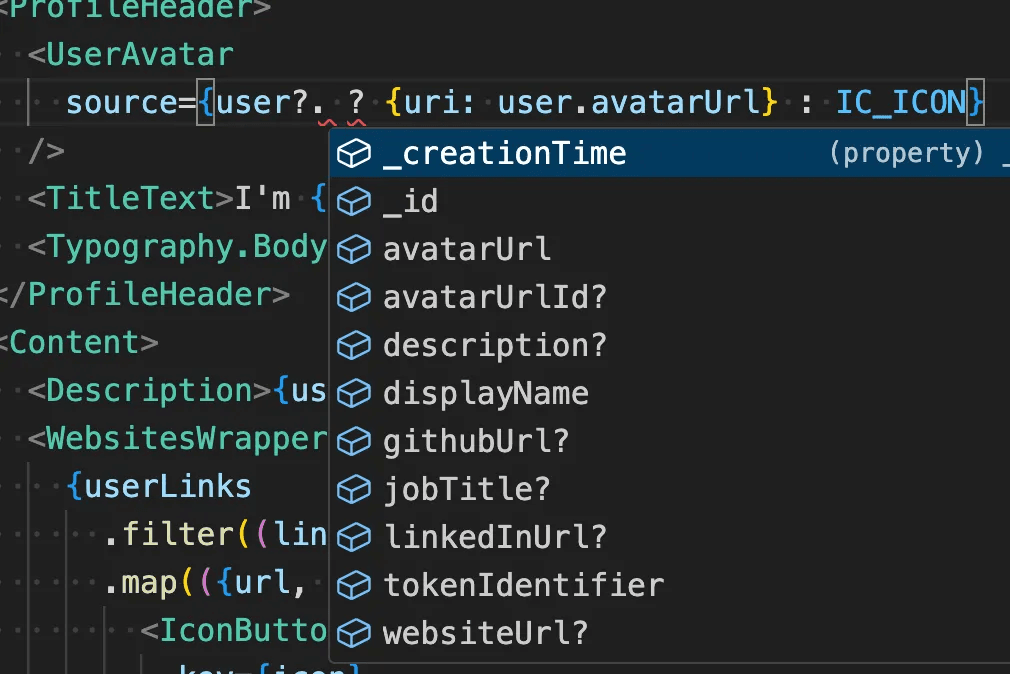
One of Convex's key strengths is letting you develop APIs first and add schemas later. This code-first approach, similar to tools like GraphQL Nexus, enables faster development while maintaining type safety.
Moreover, as some of you may have noticed, when updating profile information or images, you don’t need to manually trigger global state updates or pass events around. Convex ensures that profile information is seamlessly updated across different views automatically. This significantly enhances convenience and efficiency for developers.
This is why I’m excited to continue sharing the benefits of Convex ❤️!
Up Next
Next, we’ll look at schema creation and real-time data syncing for AI chat. These foundations will support a responsive and efficient chat system.
--> How to create an AI chat with Convex and ChatGPT
Convex is the backend platform with everything you need to build your full-stack AI project. Cloud functions, a database, file storage, scheduling, workflow, vector search, and realtime updates fit together seamlessly.