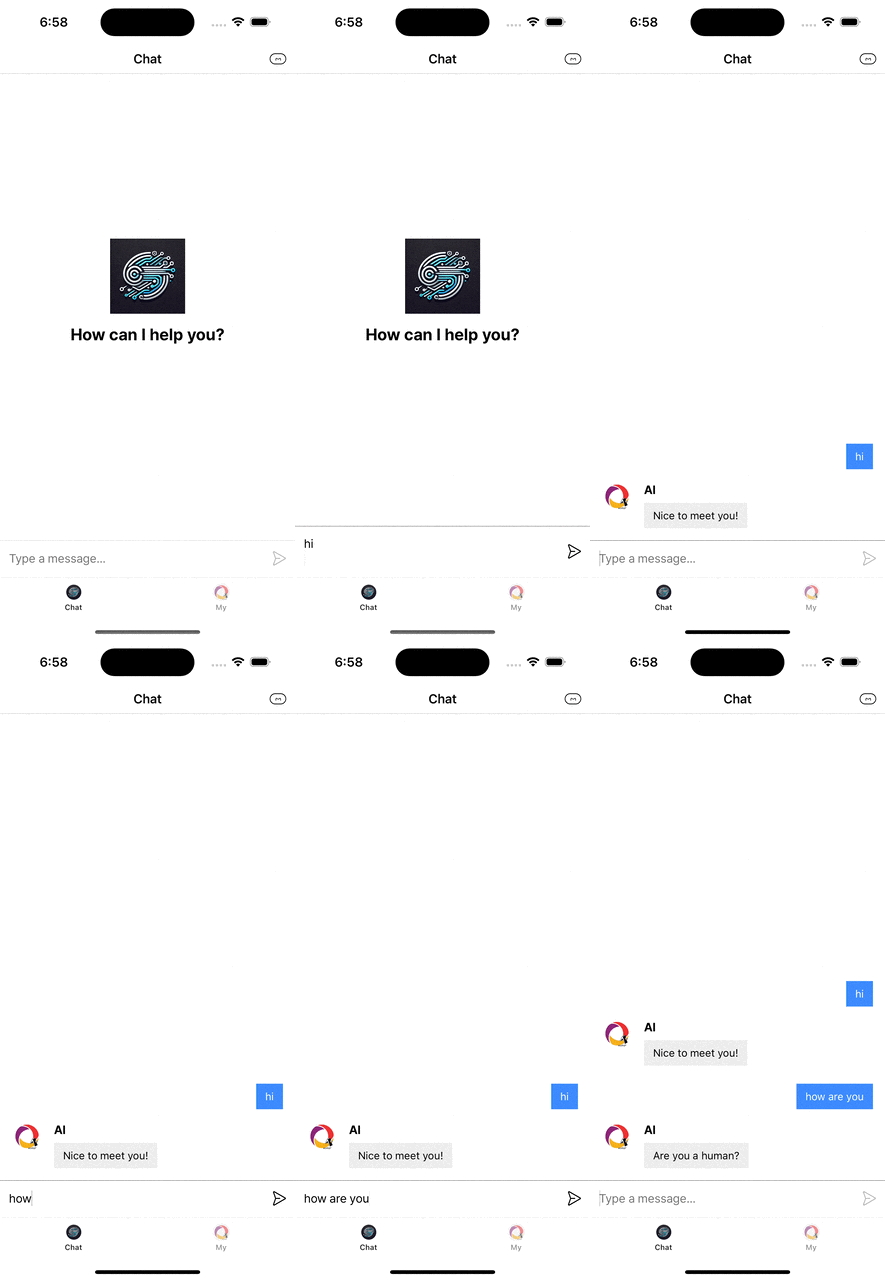
Building AI Chat with Convex and ChatGPT
This article is part of our 4-part series that covers the steps to build a fully functional app using Convex and Expo.
- User Authentication with Clerk and Convex
- Real-Time User Profiles with Convex and Clerk
- Implementing Real-Time AI Chat with Convex (You are here)
- Automating Content with Convex Cron and ChatGPT
In this post, we’ll implement real-time AI chat functionality using Convex.
Previously, we discussed managing user profiles, integrating file uploads, and leveraging a database to store user data. We concluded by covering schema design to ensure type safety and consistency in our application.
Today, we'll begin by designing a type-safe schema in Convex, then implement features for storing and retrieving chat data between the user and AI. The focus will be on core functionality, including automatic data synchronization across clients and efficient pagination for chat history. Let’s dive in! 🚀

This article focuses on core functionality implementation, leaving out explanations related to UI design. For details on the UI-related code, please refer to the prepared PR linked below. 👇
https://github.com/hyochan/convex-expo-workshop/pull/4
Overview
Target Audience
This article is written for developers familiar with Expo and React Native. If you're interested in Convex and implementing AI integration features, you'll find this article especially engaging!
From schema design to saving and retrieving AI conversations, we'll quickly cover the core concepts step by step.
What You'll Learn
- Schema Definition: Design type-safe database schemas using Convex with automatic validation.
- ChatGPT API Integration: Implement server-side AI integration with proper error handling.
- Conversation Data Management: Store and sync user conversations automatically across all connected clients.
- Pagination with Convex API: Implement cursor-based pagination for chat history using Convex's built-in query capabilities.
Through this process, you'll master how to effectively integrate Convex with the ChatGPT API! 🚀
Implementing AI Chat Functionality
1. Schema Definition
Open the convex/schema.ts file and add a messages table schema as shown below:
1export default defineSchema({
2  users: defineTable({
3    displayName: v.string(),
4    tokenIdentifier: v.string(),
5    description: v.optional(v.string()),
6    avatarUrlId: v.optional(v.id('_storage')),
7    githubUrl: v.optional(v.string()),
8    jobTitle: v.optional(v.string()),
9    linkedInUrl: v.optional(v.string()),
10    websiteUrl: v.optional(v.string()),
11  }),
12  images: defineTable({
13    author: v.id('users'),
14    body: v.id('_storage'),
15    format: v.string(),
16  }),
17+  messages: defineTable({
18+    author: v.id('users'),
19+    message: v.string(),
20+    reply: v.string(),
21+  }),
22});
23
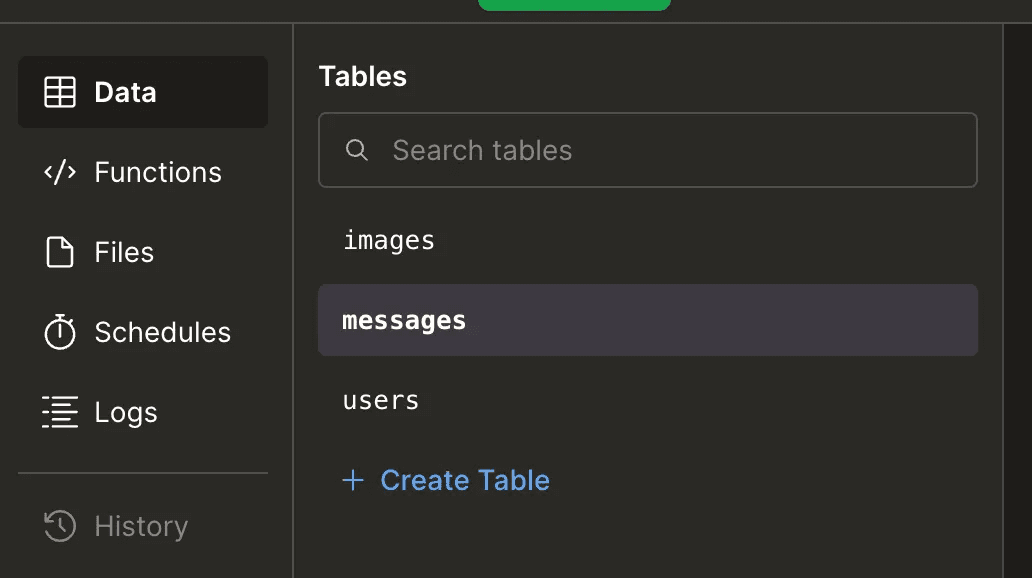
Next, run npx convex dev to apply the schema changes. Once executed, you can confirm that the messages table has been successfully created and is ready for use in your Convex project.

2. Integrating OpenAI API Key
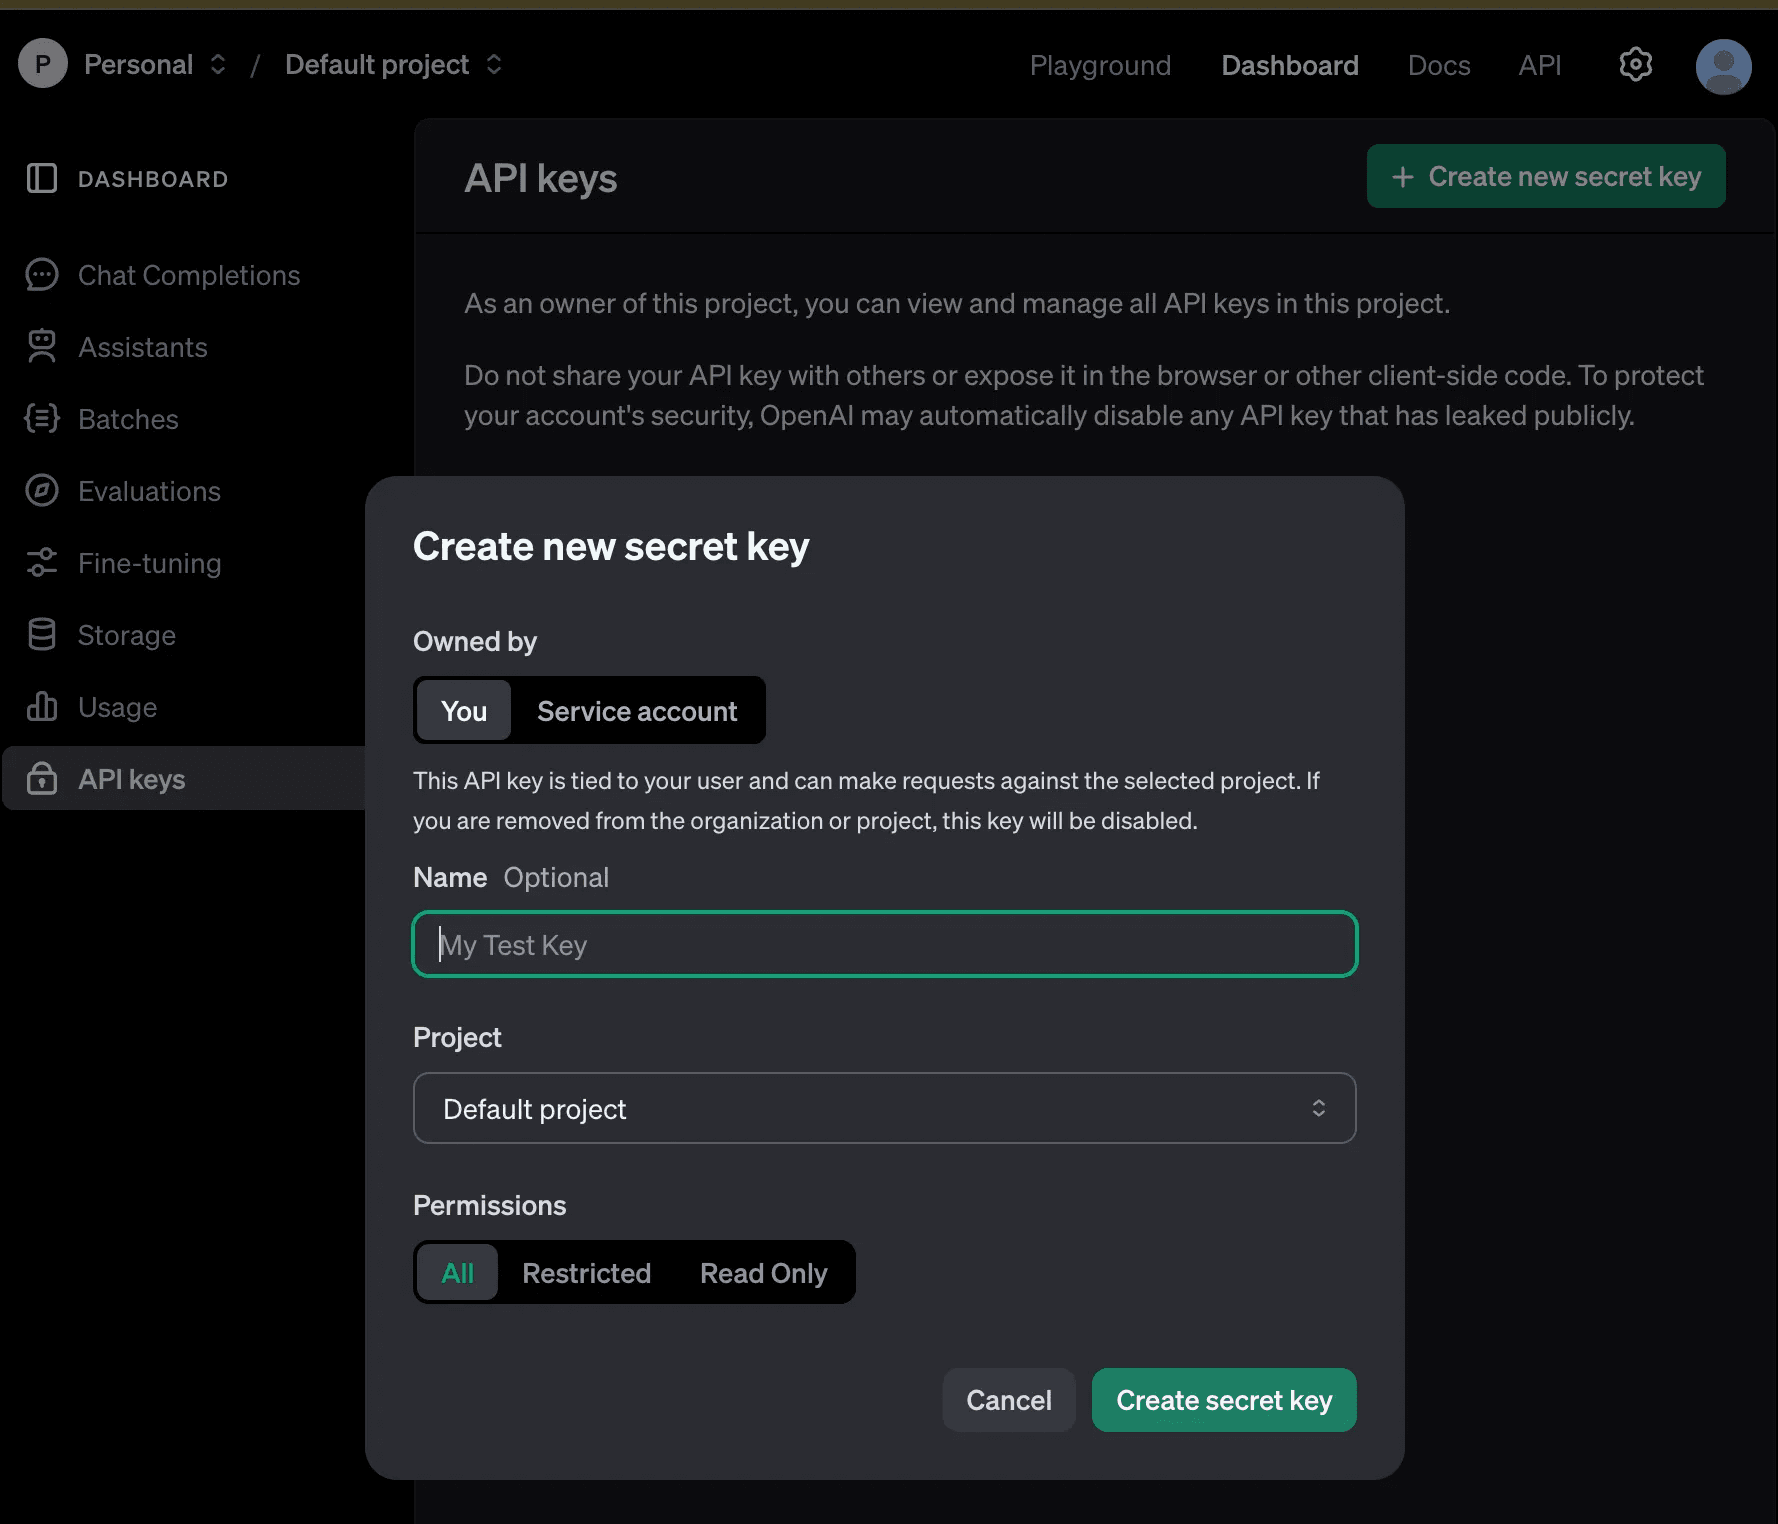
- Visit the OpenAI website and log in or create a new account.
- Click on the profile icon and select API Keys from the menu.
- Click the Create new secret key button to generate a new API key.

- Copy the generated API key and set it as the
EXPO_PUBLIC_OPENAI_KEYenvironment variable in your project to prepare for API integration.-
Add the key to the
.envfile in the root of your Expo project as shown below:1EXPO_PUBLIC_OPENAI_KEY=your_openai_key_here 2Replace
your_openai_key_herewith your actual API key. Ensure you securely store this key, as it will only be displayed once during creation.⚠️ Note:
Storing the OpenAI API key in the client, such as
EXPO_PUBLIC_OPENAI_KEY, is not recommended. This is a temporary approach to expedite implementation. In a later section, we will cover how to securely manage the API key on the server using Convex backend, ensuring it is not exposed to the client.
-
3. Developing OpenAI API Integration
In this step, you'll create a function to communicate with the OpenAI API. Start by creating a new file, src/apis/openai.ts, and add the following code:
1import { openAiKey } from '../../config';
2
3// Default chat history setup
4const chatHistories = [
5  {
6    role: 'system',
7    content:
8      'You are an expert in the Convex framework, specializing in its use with Expo. Your job is to provide professional answers to any questions related to Convex.',
9  },
10];
11
12// Function to send a message to OpenAI API
13export async function sendMessage(message: string) {
14  try {
15    // Add the user's message to the chat history
16    chatHistories.push({ role: 'user', content: message });
17
18    // Make the OpenAI API request
19    const response = await fetch('https://api.openai.com/v1/chat/completions', {
20      method: 'POST',
21      headers: {
22        'Content-Type': 'application/json',
23        Authorization: `Bearer ${openAiKey}`, // Set API key
24      },
25      body: JSON.stringify({
26        model: 'gpt-4', // Specify the OpenAI model
27        messages: chatHistories, // Include chat history in the request
28      }),
29    });
30
31    // Check the response status
32    if (!response.ok) {
33      throw new Error(`HTTP error! status: ${response.status}`);
34    }
35
36    // Process the response data
37    const data = await response.json();
38    const assistantMessage = data.choices[0].message;
39
40    // Add the assistant's message to the chat history
41    chatHistories.push(assistantMessage);
42
43    // Return the assistant's message content
44    return assistantMessage.content;
45  } catch (error) {
46    console.error('OpenAI API Error:', error);
47    throw new Error('Failed to connect to OpenAI.');
48  }
49}
50
Code Explanation
chatHistoriesArray- Stores the conversation context that OpenAI uses to maintain coherent responses.
- Starts with a
systemprompt that defines the AI assistant's role and expertise. - Note that for production use, you may want to limit the history size to control API costs.
sendMessageFunction- Adds the user's message to the
chatHistoriesarray before sending a request to the OpenAI API. - The
Authorizationheader includes the API key (openAiKey) to authenticate the request. - Returns only the assistant's response content to maintain conversation context and for easy integration with UI components.
- Adds the user's message to the
- Error Handling
- Checks the response status using response.ok to detect HTTP errors.
- Provides specific error messages for debugging API issues.
- Logs errors to help with troubleshooting while keeping user-facing messages clean.
Additional Notes
-
Secure Storage of
openAiKey:Store sensitive information like
openAiKeysecurely, such as in a.envfile, and ensure it is not exposed in your codebase or client-side code. -
Chat History Management:
The OpenAI API's cost depends on the size of the
messagesarray. Consider implementing logic to trim older messages if the array grows too large.
Next Steps
With the OpenAI API integration complete, the next step is to integrate this functionality into your app's UI. We'll use this function to handle user inputs and display the AI's responses using Convex's automatic data synchronization. Stay tuned! 😊
4. Integrating the API to Chat with ChatGPT
Create a new file at app/(home)/(tabs)/index.ts and modify the sendChatMessage function as follows to implement the message handling logic:
1const sendChatMessage = useCallback(async () => {
2  setLoading(true);
3
4  try {
5    const response = await sendMessage(message);
6
7    setChatMessages((prevMessages) => [
8      {
9        message,
10        reply: response,
11      },
12      ...prevMessages,
13    ]);
14  } catch (e) {
15    console.error(e);
16  } finally {
17    setMessage('');
18    setLoading(false);
19  }
20}, [message]);
21
Explanation
- Sending a Message:
- The
sendChatMessagefunction uses thesendMessagefunction created earlier to send the user's input to the OpenAI API and retrieve a response.
- The
- Updating Chat Messages:
- The
setChatMessagesfunction updates the state with the user's input and the AI's reply, displaying both in the chat interface.
- The
- Error Handling:
- Any errors during the API request are logged to the console for debugging.
- State Management:
- The
setMessagefunction clears the user's input field. - The
setLoadingfunction manages the loading state to provide feedback to the user (e.g., showing a spinner).
- The
By completing this step, you have successfully built an environment where users can chat with ChatGPT within your app. Messages typed by the user are sent to ChatGPT, and the responses are displayed dynamically in the chat interface.
Integrating Chat History with Convex Database
In this step, we'll implement functionality to store and retrieve chat history using Convex Database. We’ll leverage Convex’s usePaginatedQuery for seamless pagination to handle chat history as it grows.
1. Saving Chat Messages
Code for sendChatMessage and saveMessage Integration:
1const sendChatMessage = useCallback(async (): Promise<void> => {
2  if (!message.trim()) return;
3
4  setLoading(true);
5
6  try {
7    const response = await sendMessage(message);
8    const newMessage = { message, reply: response };
9
10    // Save chat to Convex Database
11    const savedMessage = await saveChatMutation(newMessage);
12
13    // Add the saved message to the UI
14    setChatMessages((prevMessages) => [savedMessage, ...prevMessages]);
15  } catch (e) {
16    console.error('Failed to send or save message:', e);
17  } finally {
18    setMessage('');
19    setLoading(false);
20  }
21}, [message, saveChatMutation]);
22
23
Explanation
- Message Sending: Sends the user's input to the OpenAI API and retrieves a response.
- Saving to Database: Uses the
saveMessagemutation to store messages in the Convex Database. - State Update: Updates
setChatMessagesto show the saved message and AI reply in the UI.
saveMessage API:
1import { mutation } from './_generated/server';
2import { v } from 'convex/values';
3import { userByExternalId } from './users';
4
5export const saveMessage = mutation({
6  args: v.object({
7    message: v.string(),
8    reply: v.string(),
9  }),
10  handler: async (ctx, args) => {
11    const identity = await ctx.auth.getUserIdentity();
12    if (!identity) {
13      throw new Error('Called saveMessage without authentication present');
14    }
15
16    const user = await userByExternalId(ctx, identity.tokenIdentifier);
17
18    if (!user) {
19      throw new Error('User not found');
20    }
21
22    const id = await ctx.db.insert('messages', {
23      ...args,
24      author: user._id,
25    });
26
27    return await ctx.db.get('messages', id); // Return the saved data
28  },
29});
30
2. Retrieving Chat History (With Pagination)
list API:
The list API uses Convex’s pagination functionality to load data incrementally.
1import { query } from './_generated/server';
2import { paginationOptsValidator } from 'convex/server';
3
4export const list = query({
5  args: { paginationOpts: paginationOptsValidator },
6  handler: async (ctx, { paginationOpts }) => {
7    return await ctx.db
8      .query('messages')
9      .order('desc')
10      .paginate(paginationOpts); // Apply pagination
11  },
12});
13
Explanation
- Pagination Setup: The
listAPI retrieves chat history in pages, sorted by most recent messages first. - Cursor-Based Pagination: Ensures consistent ordering and efficient data loading.
Loading Data with usePaginatedQuery
Pagination Code:
1const { results, status, loadMore } = usePaginatedQuery(
2  api.messages.list,
3  { paginationOpts: { initialNumItems: 5 } }
4);
5
6useEffect(() => {
7  if (results) {
8    setChatMessages(results);
9  }
10}, [results]);
11
12const loadMoreMessages = () => {
13  if (status === 'CanLoadMore') {
14    loadMore(); // Load additional data
15  }
16};
17
18
Explanation
- Initial Load: Fetches the first batch of messages when the chat interface loads.
- Load More Messages: Dynamically loads additional messages as the user scrolls.
- Real-Time Sync: Ensures that newly added messages are displayed immediately across all connected clients.
Final UI Implementation
Integrating with FlashList and loadMoreMessages:
1<FlashList
2  data={chatMessages}
3  estimatedItemSize={160}
4  renderItem={({ item }) => (
5    <ChatMessageListItem item={item} />
6  )}
7  onEndReached={loadMoreMessages} // Trigger data loading when reaching the end
8  onEndReachedThreshold={0.5}
9  ListEmptyComponent={
10    <EmptyContainer>
11      <Typography.Heading4>No messages yet.</Typography.Heading4>
12    </EmptyContainer>
13  }
14/>
15
Results and Next Steps
Using Convex's usePaginatedQuery and real-time feaure, you can now efficiently manage chat histories. You can enhance this implementation by adding:
- Full-text search across message history
- Message editing and deletion
- Typing indicators
- Read receipts
You can find the complete implementation in the Convex Expo Workshop GitHub Repository. 🚀
By leveraging Convex Database and Expo, we successfully created a simple yet efficient chat environment. Convex manages the complexity of data synchronization, letting you focus on building features rather than infrastructure.
For developers who have manually implemented pagination or chat functionalities before, Convex’s flexible and intuitive approach will undoubtedly stand out. It not only reduces code complexity but also ensures both stability and scalability, making it a true game-changer.
Convex empowers developers to go beyond basic CRUD operations, enabling the implementation of sophisticated data management with ease. We hope this inspires you to explore more features and expand your application, enhancing user experiences along the way. 🚀
"Strength in simplicity" – this is the true value of Convex. 😊
Final Implementation
The complete implementation covered in this article can be found at https://github.com/hyochan/convex-expo-workshop/pull/5.
Visit the link to explore the code and dive deeper into the implementation process!
Up Next
In the final part of this series, we'll walk through how to use Convex Cron to automate tasks and generate content effortlessly. You'll see how to schedule recurring operations, streamline workflows, and bring a new level of efficiency to your app.
--> How to schedule AI content creation with Convex Cron & ChatGPT
Convex is the backend platform with everything you need to build your full-stack AI project. Cloud functions, a database, file storage, scheduling, workflow, vector search, and realtime updates fit together seamlessly.