
Introducing Convex Auth

Convex Auth is a library for implementing authentication using your Convex backend.
Check it out in the Convex docs to get started or play with the example demo (source).
This article is based on the launch video.
Motivation
Convex is designed for building multi-user applications. And if your app has users, it needs authentication. But authentication is a really complex component of a full-stack app. For this reason we have been recommending the built-in integrations with mature authentication platforms like Clerk and Auth0.
Yet many developers have been asking for a self-hosted solution. The auth platforms I mentioned have a ton of features but they also store the authentication data. This complicates your app, as that data has to be somehow synced or shared with your backend and database.
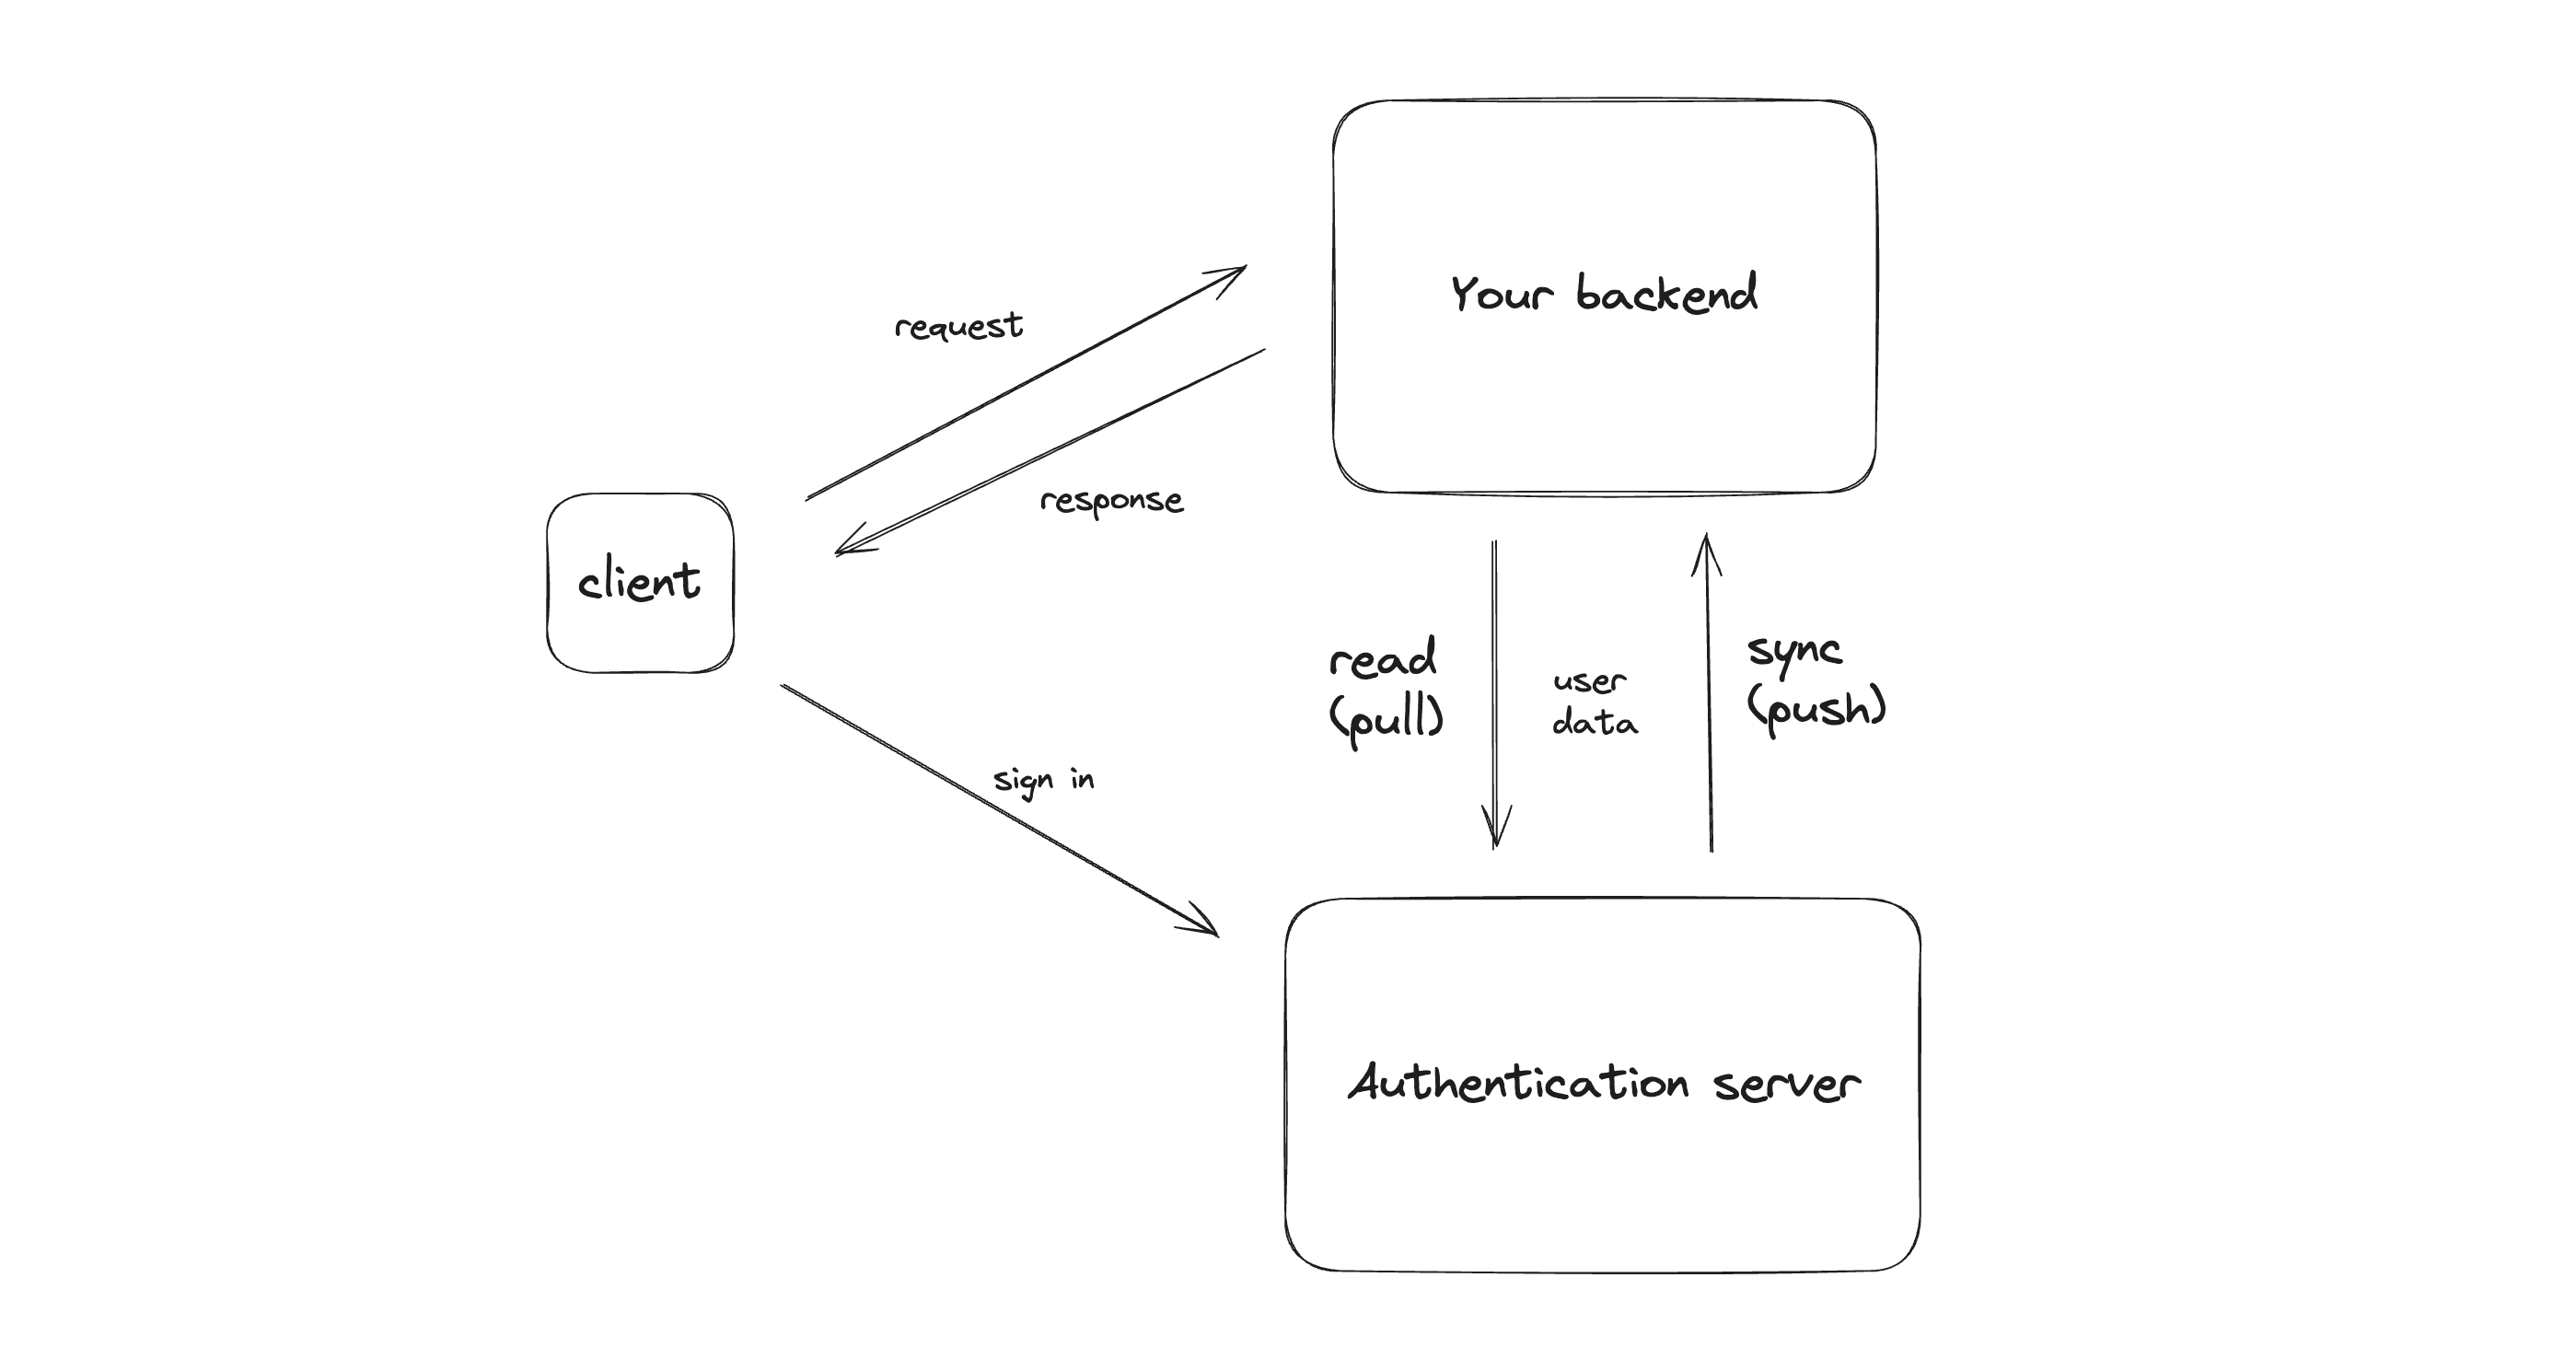 diagram of client convex and auth server
This is a surmountable challenge, but maybe you’re just getting started and your app doesn’t need every authentication feature. You’d rather have more control over the data and a simpler architecture to build on top of.
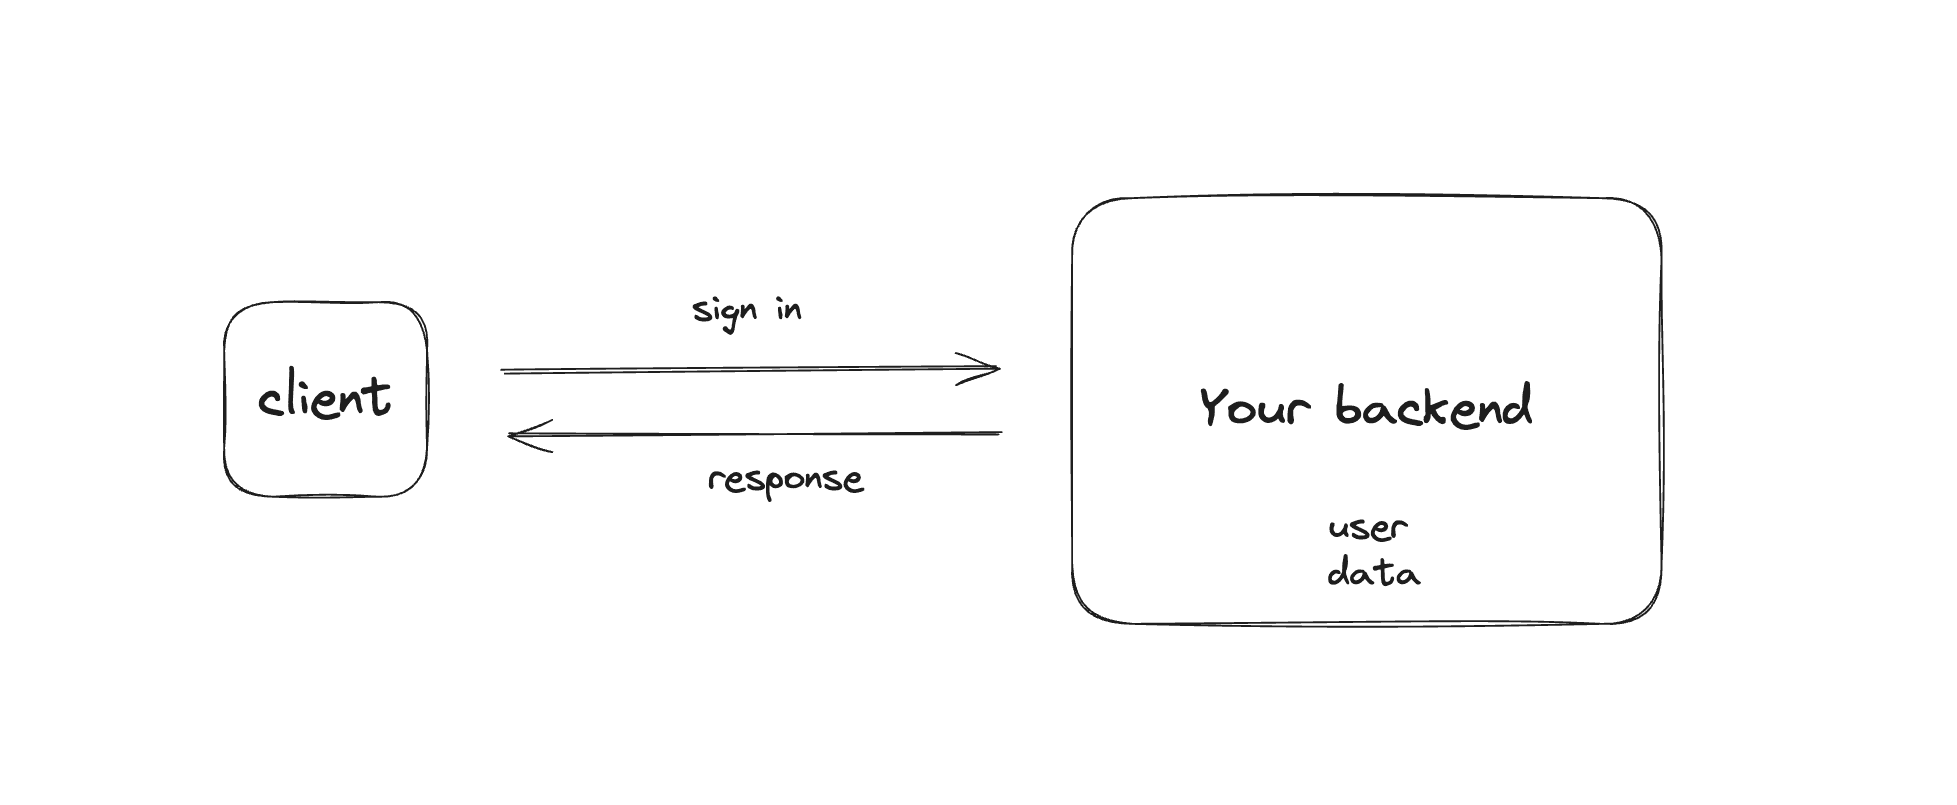 diagram of client and convex server
Functionality
Convex Auth enables you to build such a solution. It is inspired by the excellent Auth.js and Lucia libraries, and reuses some of their implementation. It is also similar in its capabilities to auth solutions such as Firebase Auth and Supabase Auth (although it doesn’t have all of their features yet).
In the demo you can see the various sign-in methods you can implement with Convex Auth. It supports sign-in via OAuth, magic links, one-time-passwords and normal email and password combination. You can use any of the 80 OAuth providers supported by Auth.js.
Code deep dive
Server configuration
The main configuration file is auth.ts in your convex directory, which configures the available authentication methods:
1import GitHub from "@auth/core/providers/github";
2import Google from "@auth/core/providers/google";
3import Resend from "@auth/core/providers/resend";
4import { Password } from "@convex-dev/auth/providers/Password";
5
6export const { auth, signIn, signOut, store } = convexAuth({
7  providers: [GitHub, Google, Resend, Password],
8});
9
Your schema.ts must also include the tables used by the library, including the users table. This is because the library uses indexes on these tables for efficient lookups:
1import { authTables } from "@convex-dev/auth/server";
2import { defineSchema, defineTable } from "convex/server";
3import { v } from "convex/values";
4
5export default defineSchema({
6  ...authTables,
7  // Your other tables...
8});
9
There is additional configuration in auth.config.ts and https.ts, but you won’t need to touch these. See Manual Setup for more details if you’re interested.
Frontend configuration
On the frontend, instead of using ConvexProvider, the app is wrapped in ConvexAuthProvider. Then in the App root component, the Authenticated and Unauthenticated components (from convex/react) are used to render different UI based on the authentication state. When not authenticated, your app can render the sign-in form:
1import { Content } from "@/Content";
2import { SignInForm } from "@/auth/SignInForm";
3import { Authenticated, Unauthenticated } from "convex/react";
4
5export default function App() {
6  return (
7    <>
8      <Authenticated>
9        <Content />
10      </Authenticated>
11      <Unauthenticated>
12        <SignInForm />
13      </Unauthenticated>
14    </>
15  );
16}
17
18
The key part of the sign-in UI is calling the signIn function with the name of one of the authentication methods configured in auth.ts. For example here’s a form that sends the user a magic link:
1
2import { useAuthActions } from "@convex-dev/auth/react";
3
4export function SignInWithMagicLink() {
5  const { signIn } = useAuthActions();
6  return (
7    <form
8      className="flex flex-col"
9      onSubmit={(event) => {
10        event.preventDefault();
11        const formData = new FormData(event.currentTarget);
12        void signIn("resend", formData);
13      }}
14    >
15      <label htmlFor="email">Email</label>
16      <input name="email" id="email" className="mb-4" autoComplete="email" />
17      <button type="submit">Send sign-in link</button>
18    </form>
19  );
20}
21
Handling authentication
Finally, let’s look at how the authentication state is used to power the signed-in experience. The auth.ts file exports an auth helper, which has methods for retrieving the current user and session ID. Using these methods, we can return the information about the current user back to the client:
1import { query } from "./_generated/server";
2import { auth } from "./auth";
3
4export const viewer = query({
5  args: {},
6  handler: async (ctx) => {
7    const userId = await auth.getUserId(ctx);
8    return userId !== null ? ctx.db.get("users", userId) : null;
9  },
10});
11
As well as enforce that certain functions can only be called by signed-in users:
1import { query, mutation } from "./_generated/server";
2import { v } from "convex/values";
3import { auth } from "./auth";
4
5export const send = mutation({
6  args: { body: v.string() },
7  handler: async (ctx, { body }) => {
8    const userId = await auth.getUserId(ctx);
9    if (userId === null) {
10      throw new Error("Not signed in");
11    }
12    // Send a new message.
13    await ctx.db.insert("messages", { body, userId });
14  },
15});
16
Conclusion
And that’s all it takes to get self-hosted auth to work. From here I recommend you read through the docs. They go into detail on how to implement the various authentication methods and on the trade-offs between them. I hope you’ll find the library useful. Please let us know what you think on our discord.
Convex is the reactive backend platform that keeps up with you and your agents. Database, functions, workflow, sync, search, file storage, and more. All TypeScript, zero glue.