
How I built NotesGPT – a full-stack AI voice note taking app
Last week, I launched notesGPT, a full-stack voice note taking app that got 35,000 visitors, 7,000 users, and over 1,000 GitHub stars so far in the last week. It allows you to record a voice note, transcribes it uses Whisper, and uses Mixtral via Together to extract action items and display them in an action items view. It’s also fully open source and comes equipped with authentication, storage, vector search, action items, and is fully responsive on mobile for ease of use.
I’m going to to walk you through exactly how I built it.

Architecture and tech stack
This is a quick diagram for the architecture. We’ll be discussing each piece in more depth and also showing code examples as we go.
 The frontend calls the Convex server functions, which communicate with the DB, kick off background actions, etc.
Here’s the overall tech stack I used:
- Convex for the database and cloud functions
- Next.js App Router for the framework
- Replicate for Whisper transcriptions
- Mixtral with JSON mode for the LLM
- Together.ai for inference and embeddings
- Convex File Storage for storing voice notes
- Convex Vector search for vector search
- Clerk for user authentication
- Tailwind CSS for styling
Landing Page
The first piece of the app is the landing page you see when you navigate to notesGPT.
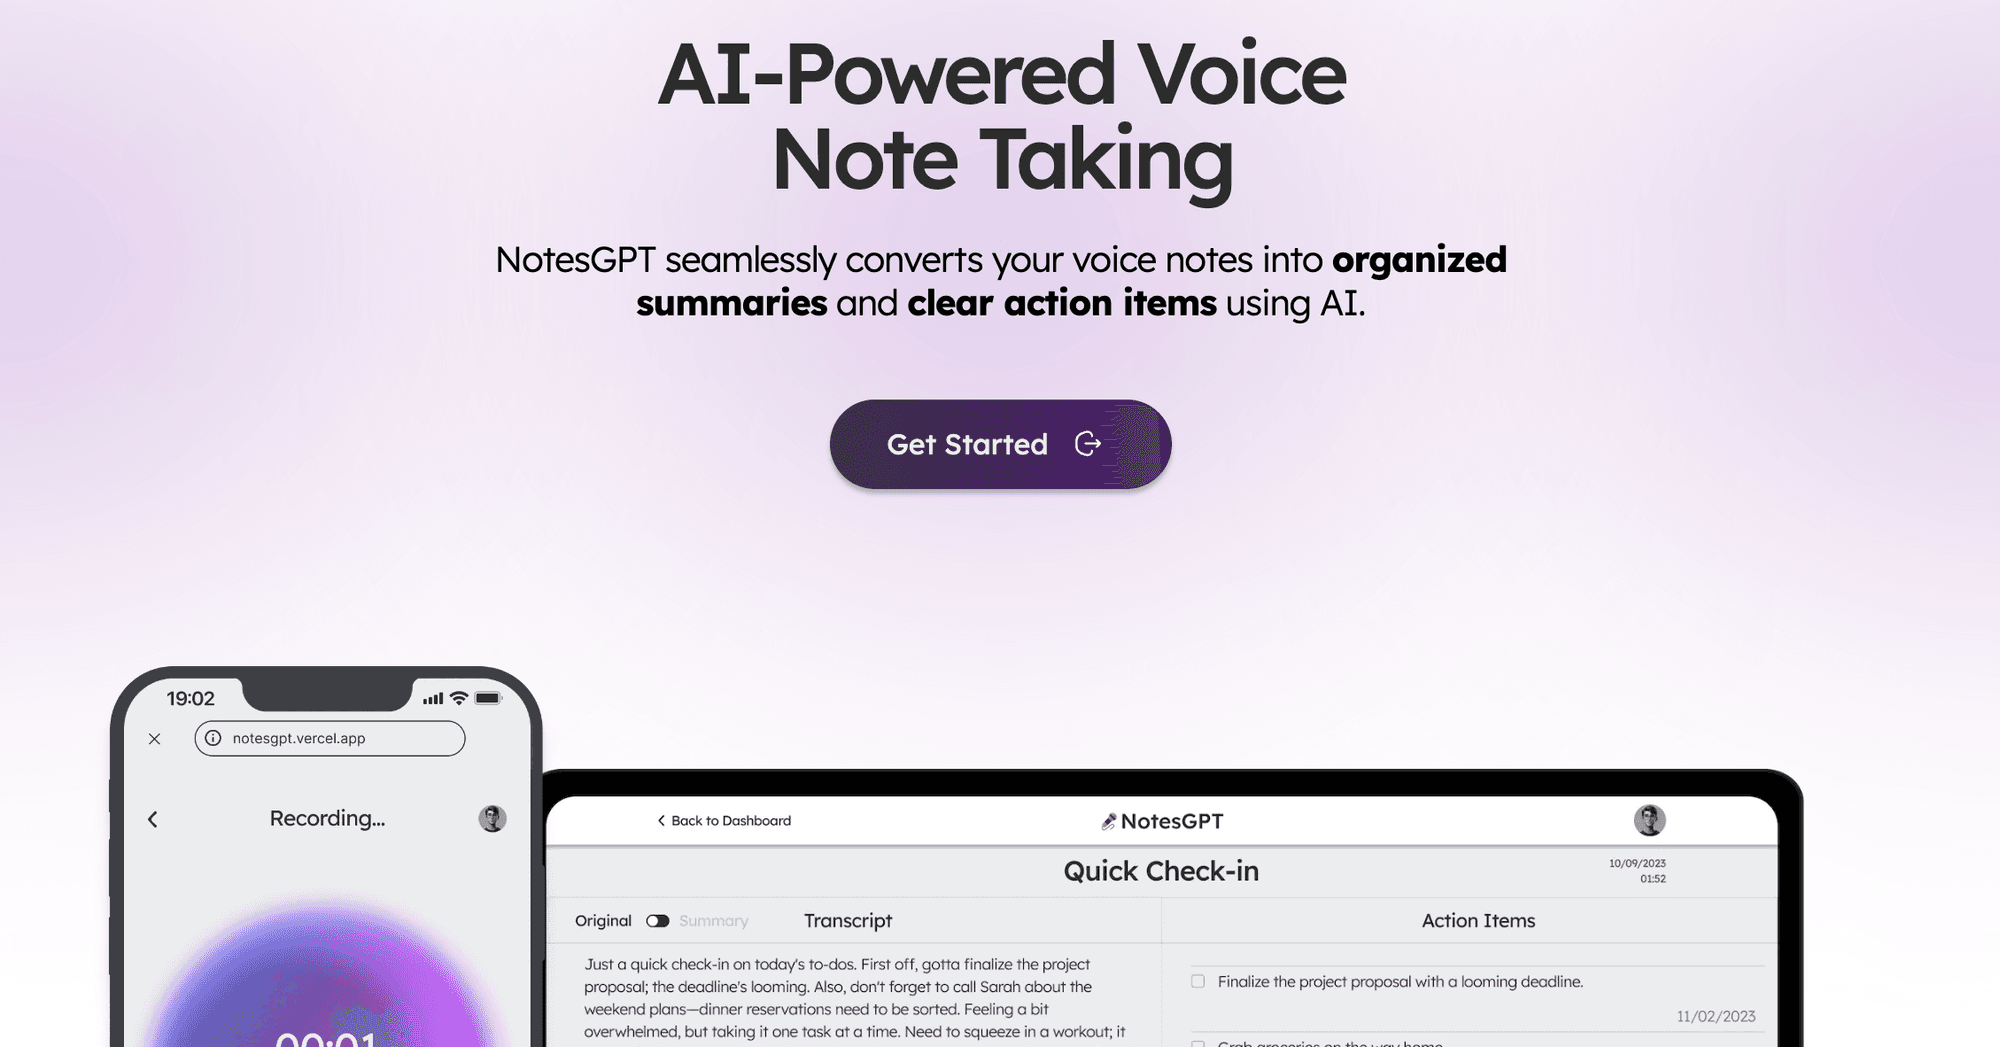
 Landing page with an image of it on mobile & web, along with a Get Started button
The first things users see is this landing page which along with the rest of the app, was built with Next.js and with Tailwind CSS for styling. I enjoy using Next.js since it makes it it easy to spin up web apps and just write React code. Tailwind CSS is great too since it allows you to iterate quickly on your web pages while staying in the same file as your JSX.
Authentication with Clerk and Convex
When the user clicks either of the buttons on the homepage, they get directed to the sign in screen. This is powered by Clerk, an easy authentication solution that integrates well with Convex, which is what we’ll be using for our entire backend including cloud functions, database, storage, and vector search.
 Clerk sign in UI
Clerk and Convex are both easy to setup. You can simply create an account on both services, install their npm libraries, run npx convex dev to setup your convex folder, and create a ConvexProvider.ts file as seen below to wrap your app with.
1'use client';
2
3import { ReactNode } from 'react';
4import { ConvexReactClient } from 'convex/react';
5import { ConvexProviderWithClerk } from 'convex/react-clerk';
6import { ClerkProvider, useAuth } from '@clerk/nextjs';
7
8const convex = new ConvexReactClient(process.env.NEXT_PUBLIC_CONVEX_URL!);
9
10export default function ConvexClientProvider({
11  children,
12}: {
13  children: ReactNode;
14}) {
15  return (
16    <ClerkProvider
17      publishableKey={process.env.NEXT_PUBLIC_CLERK_PUBLISHABLE_KEY!}
18    >
19      <ConvexProviderWithClerk client={convex} useAuth={useAuth}>
20        {children}
21      </ConvexProviderWithClerk>
22    </ClerkProvider>
23  );
24}
25
Check out the Convex Quickstart and the Convex Clerk auth section for more details.
Setting up our schema
You can use Convex with or without a schema. In my case, I knew the structure of my data and wanted to define it so i did so below. This also gives you a really nice type-safe API to work with when interacting with your database. We’re defining two tables – a notes table to store all voice note information and actionItems table for extracted action items. We’ll also define indexes to be able to quickly query the data by userId and noteId.
1import { defineSchema, defineTable } from 'convex/server';
2import { v } from 'convex/values';
3
4export default defineSchema({
5  notes: defineTable({
6    userId: v.string(),
7    audioFileId: v.string(),
8    audioFileUrl: v.string(),
9    title: v.optional(v.string()),
10    transcription: v.optional(v.string()),
11    summary: v.optional(v.string()),
12    embedding: v.optional(v.array(v.float64())),
13    generatingTranscript: v.boolean(),
14    generatingTitle: v.boolean(),
15    generatingActionItems: v.boolean(),
16  })
17    .index('by_userId', ['userId'])
18    .vectorIndex('by_embedding', {
19      vectorField: 'embedding',
20      dimensions: 768,
21      filterFields: ['userId'],
22    }),
23  actionItems: defineTable({
24    noteId: v.id('notes'),
25    userId: v.string(),
26    task: v.string(),
27  })
28    .index('by_noteId', ['noteId'])
29    .index('by_userId', ['userId']),
30});
31
Dashboard
Now that we have our backend and authentication setup along with our schema, we can take a look at fetching data. After signing into the app, users can view their dashboard which lists all of the voice notes they’ve recorded.
 NotesGPT Dashboard
To do this, we first define a query in the convex folder that uses auth to take in a userId, verify it’s valid, and returns all the notes that match a user’s userId.
1export const getNotes = queryWithUser({
2  args: {},
3  handler: async (ctx, args) => {
4    const userId = ctx.userId;
5    if (userId === undefined) {
6      return null;
7    }
8    const notes = await ctx.db
9      .query('notes')
10      .withIndex('by_userId', (q) => q.eq('userId', userId))
11      .collect();
12
13    const results = Promise.all(
14      notes.map(async (note) => {
15        const count = (
16          await ctx.db
17            .query('actionItems')
18            .withIndex('by_noteId', (q) => q.eq('noteId', note._id))
19            .collect()
20        ).length;
21        return {
22          count,
23          ...note,
24        };
25      }),
26    );
27
28    return results;
29  },
30});
31
After this, we can call this getNotes query with a user’s authentication token via a function that convex provides to display all the user’s notes in the dashboard. We’re using server side rendering to fetch this data on the server then passing it into the <DashboardHomePage /> client component. This also ensures that the data stays up to date on the client as well.
1import { api } from '@/convex/_generated/api';
2import { preloadQuery } from 'convex/nextjs';
3import DashboardHomePage from './dashboard';
4import { getAuthToken } from '../auth';
5
6const ServerDashboardHomePage = async () => {
7  const token = await getAuthToken();
8  const preloadedNotes = await preloadQuery(api.notes.getNotes, {}, { token });
9
10  return <DashboardHomePage preloadedNotes={preloadedNotes} />;
11};
12
13export default ServerDashboardHomePage;
14
Recording a voice note
Initially, users won’t have any voice notes on their dashboard so they can click the “record a new voice note” button to record one. They’ll see the following screen that will allow them to record.
 UI to record a voice note on NotesGPT
This will record a voice note using native browser APIs, save the file in Convex file storage, then send it to Whisper through Replicate to be transcribed. The first thing we do is define a
UI to record a voice note on NotesGPT
This will record a voice note using native browser APIs, save the file in Convex file storage, then send it to Whisper through Replicate to be transcribed. The first thing we do is define a createNote mutation in our convex folder that will take in this recording, save some information in the Convex database, then call the whisper action.
1export const createNote = mutationWithUser({
2  args: {
3    storageId: v.id('_storage'),
4  },
5  handler: async (ctx, { storageId }) => {
6    const userId = ctx.userId;
7    let fileUrl = (await ctx.storage.getUrl(storageId)) as string;
8
9    const noteId = await ctx.db.insert('notes', {
10      userId,
11      audioFileId: storageId,
12      audioFileUrl: fileUrl,
13      generatingTranscript: true,
14      generatingTitle: true,
15      generatingActionItems: true,
16    });
17
18    await ctx.scheduler.runAfter(0, internal.whisper.chat, {
19      fileUrl,
20      id: noteId,
21    });
22
23    return noteId;
24  },
25});
26
The whisper action is seen below. It uses Replicate as the hosting provider for Whisper.
1export const chat = internalAction({
2  args: {
3    fileUrl: v.string(),
4    id: v.id('notes'),
5  },
6  handler: async (ctx, args) => {
7    const replicateOutput = (await replicate.run(
8      'openai/whisper:4d50797290df275329f202e48c76360b3f22b08d28c196cbc54600319435f8d2',
9      {
10        input: {
11          audio: args.fileUrl,
12          model: 'large-v3',
13          translate: false,
14          temperature: 0,
15          transcription: 'plain text',
16          suppress_tokens: '-1',
17          logprob_threshold: -1,
18          no_speech_threshold: 0.6,
19          condition_on_previous_text: true,
20          compression_ratio_threshold: 2.4,
21          temperature_increment_on_fallback: 0.2,
22        },
23      },
24    )) as whisperOutput;
25
26    const transcript = replicateOutput.transcription || 'error';
27
28    await ctx.runMutation(internal.whisper.saveTranscript, {
29      id: args.id,
30      transcript,
31    });
32  },
33});
34
Also, all these files can be seen in the Convex dashboard under “Files”.
 Convex Dashboard UI to see uploaded files
Generating action items
After the user finishes recording their voice note and it gets transcribed via whisper, the output is then passed into Together AI. We show this loading screen in the meantime.
 A page showing loading indicators for the title, action items, transcription, and summary
We first define a schema that we want our output to be in. We then pass this schema into our Mixtral model hosted on Together.ai with a prompt to identify a summary of the voice note, a transcript, and generate action items based on the transcript. We then save all this information to the Convex database. To do this, we create a Convex action in the convex folder.
1// convex/together.ts
2
3const NoteSchema = z.object({
4  title: z
5    .string()
6    .describe('Short descriptive title of what the voice message is about'),
7  summary: z
8    .string()
9    .describe(
10      'A short summary in the first person point of view of the person recording the voice message',
11    )
12    .max(500),
13  actionItems: z
14    .array(z.string())
15    .describe(
16      'A list of action items from the voice note, short and to the point. Make sure all action item lists are fully resolved if they are nested',
17    ),
18});
19
20export const chat = internalAction({
21  args: {
22    id: v.id('notes'),
23    transcript: v.string(),
24  },
25  handler: async (ctx, args) => {
26    const { transcript } = args;
27	  const extract = await client.chat.completions.create({
28	    messages: [
29	      {
30	        role: 'system',
31	        content:
32	          'The following is a transcript of a voice message. Extract a title, summary, and action items from it and answer in JSON in this format: {title: string, summary: string, actionItems: [string, string, ...]}',
33	      },
34	      { role: 'user', content: transcript },
35	    ],
36	    model: 'mistralai/Mixtral-8x7B-Instruct-v0.1',
37	    response_model: { schema: NoteSchema, name: 'SummarizeNotes' },
38	    max_tokens: 1000,
39	    temperature: 0.6,
40	    max_retries: 3,
41	  });
42	  const { title, summary, actionItems } = extract;
43
44	  await ctx.runMutation(internal.together.saveSummary, {
45	    id: args.id,
46	    summary,
47	    actionItems,
48	    title,
49	  });
50});
51
When Together.ai responds, we get this final screen which lets users toggle between their transcript and a summary on the left, and see and check off the action items on the right.
 Example note
Vector Search
The final piece of the app is vector search. We’re using Together.ai embeddings to embed the transcripts and make it possible for folks to search in the dashboard based on the semantic meaning of the transcripts.
We do this by creating a similarNotes action in the convex folder that takes in a user’s search query, generates an embedding for it, and finds the most similar notes to display on the page.
1export const similarNotes = actionWithUser({
2  args: {
3    searchQuery: v.string(),
4  },
5  handler: async (ctx, args): Promise<SearchResult[]> => {
6    // 1. Create the embedding
7    const getEmbedding = await togetherai.embeddings.create({
8      input: [args.searchQuery.replace('/n', ' ')],
9      model: 'togethercomputer/m2-bert-80M-32k-retrieval',
10    });
11    const embedding = getEmbedding.data[0].embedding;
12
13    // 2. Then search for similar notes
14    const results = await ctx.vectorSearch('notes', 'by_embedding', {
15      vector: embedding,
16      limit: 16,
17      filter: (q) => q.eq('userId', ctx.userId), // Only search my notes.
18    });
19
20    return results.map((r) => ({
21      id: r._id,
22      score: r._score,
23    }));
24  },
25});
26
Conclusion
Just like that, we’ve built a production-ready full-stack AI app ready with authentication, a database, storage, and APIs. Feel free to check out notesGPT to generate action items from your notes or the GitHub repo for reference. And if you had any questions, shoot me a DM and I’d be more than happy to answer it!
Convex is the reactive backend platform that keeps up with you and your agents. Database, functions, workflow, sync, search, file storage, and more. All TypeScript, zero glue.