Testing authenticated functions from the dashboard

This post will walk you through testing your functions on the dashboard when they require authentication.
Base case
If your function is only checking auth like this:
1const identity = await ctx.auth.getUserIdentity();
2if (identity === null) throw new Error("Unauthenticated");
3
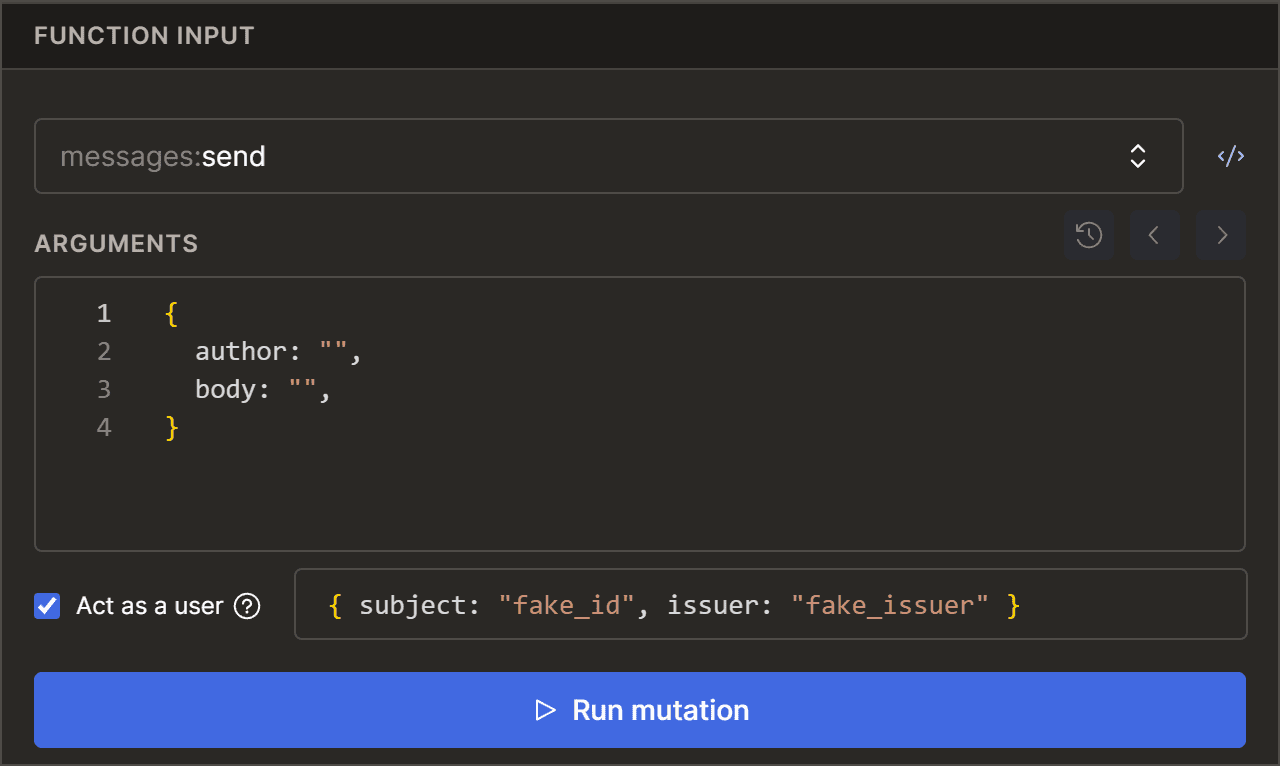
Then you can pass this check by checking the "Act as a user" button, which will add fake subject & issuer fields.
 Acting as a user in the dashboard
This will result in identity looking like this instead of null:
1# console.log(identity)
2{
3  issuer: "fake_issuer",
4  subject: "fake_id",
5  tokenIdentifier: "fake_issuer|fake_id",
6}
7
Acting as a user
1. Get your JWT
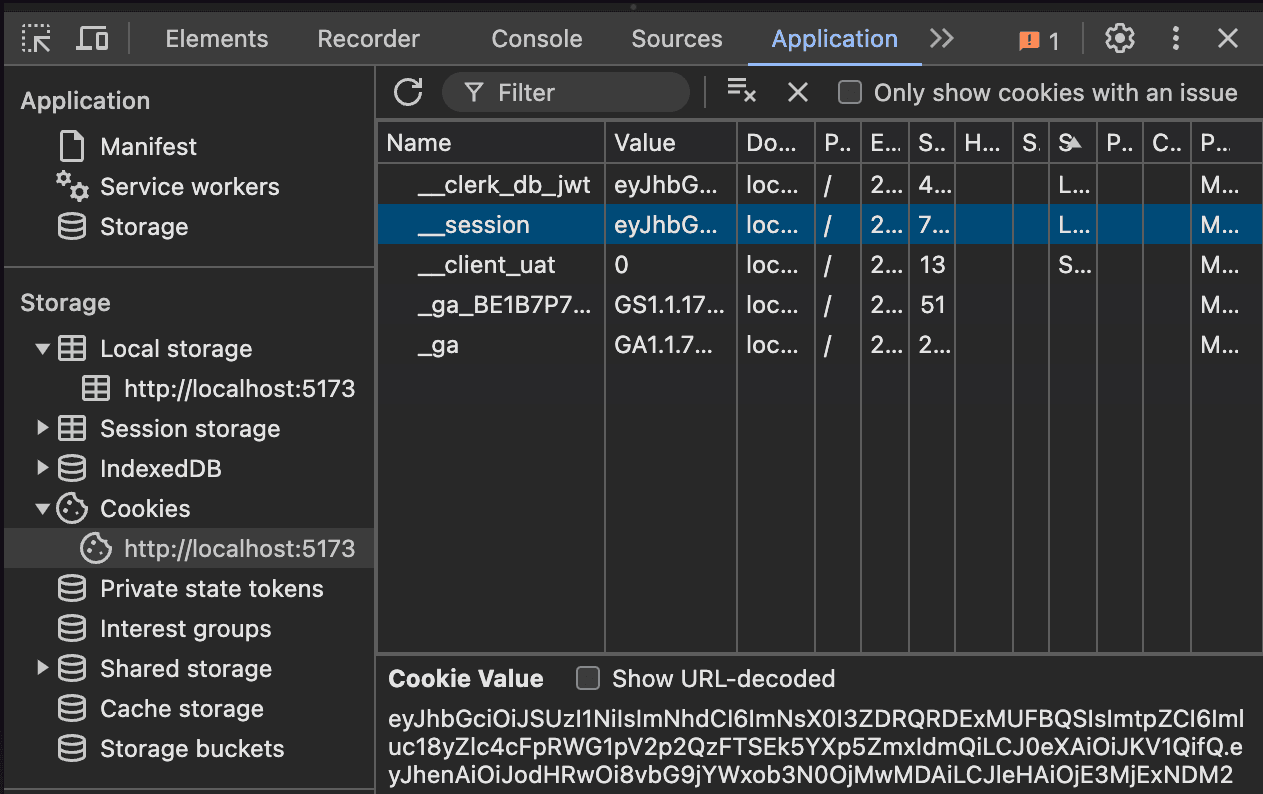
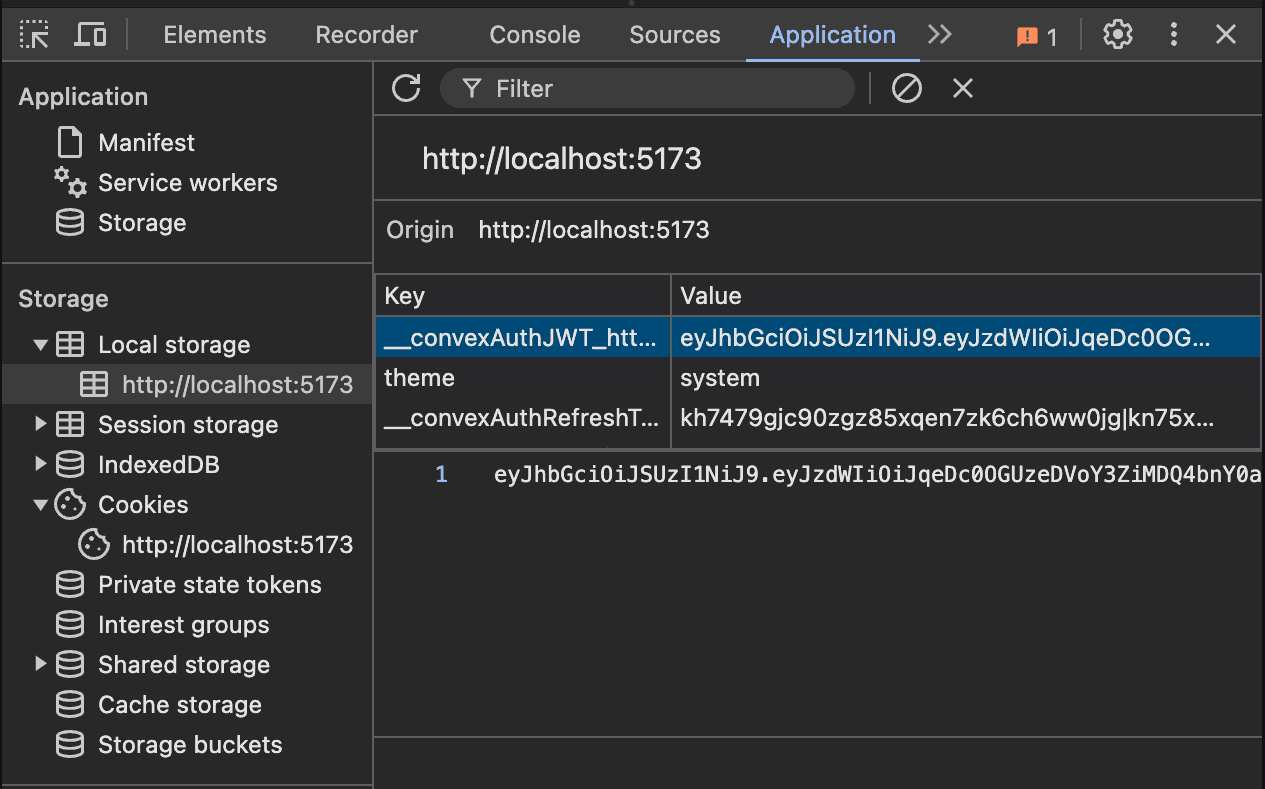
If you are sending requests as yourself, you can get your own JWT from your browser. This is often stored in your browser's cookies or local storage, which you can access in the developer tools under the "Application" tab.
For Clerk, you'll want the __session cookie:
 Cookies section, with a cookie named "__session..."
For Convex Auth you'll want the __convexAuthJWT_... cookie or value in local storage:
 Local storage section, with a key named "_convexAuthJWT..."
If you want to test a function as someone else, first follow these instructions with your own JWT, then modify the fields to match the desired user.
2. Decode your JWT fields
Even though JWTs are secured by a signature, all of the fields can be decoded by anyone. The "secure" JWT merely provides a signed signature of the fields, so you can verify that the fields haven't been modified since it was signed.
You can then use jwt.io to decode the value. If it's an OpenID ID Token the "payload" should look something like this when you paste the JWT into the "Encoded" text area on that site:
1{
2  "sub": "some-id-string",
3  "iat": 1723171234,
4  "iss": "https://some-auth-provider-issuer-url.com",
5  "aud": "convex",
6  "exp": 1723175678
7}
8
It can also have other fields, such as these standard OpenID claims ("claims" refers to the fields in the JWT).
3. Use the fields to "Act as a user"
In the Convex dashboard function runner you can check the "Act as a user" checkbox and specify what the object returned from ctx.auth.getUserIdentity() will be when calling your function from the dashboard.
The identity fields can mostly be copied from the JWT, but the ID Token will change or be omitted. Taking the example from above, you would enter something like this in the dashboard's field for "Act as a user":
1{
2  "subject": "some-id-string",
3  "issuer": "https://some-auth-provider-issuer-url.com"
4}
5
Along with other fields you might want like those listed here. You can get the issuer URL from your auth.config.ts value for the provider's domain. This is likely an environment variable.
You don't have to pass anything your function doesn't rely on. For many applications the "subject" and "issuer" will suffice unless you're testing user creation.
Testing with Convex Auth
Convex Auth allows you to use your Convex backend as the authentication provider for your project, issuing and validating its own JWTs. Under the hood, it isn't storing much in that JWT other than the sessionId and userId. If you don't want to go through the JWT discovering and decoding dance, you can just pass in the subject and user IDs directly:
1{
2  subject: "userId|sessionId",
3	issuer: "https://your-deployment-123.convex.site"
4}
5
Where the sessionId comes from the authSessions table, and the userId is whatever your desired user's ID is, with a | between them.
Note: if you don't need one or the other in your function (e.g. if you aren't using auth.getUserId), the unused ID doesn't need to be a valid ID string. If you only use userId for instance, you could pass:
1{ subject: "<userId>|-", issuer: "" }
2
Mimicking tokenIdentifier
The tokenIdentifier field of auth.getUserIdentity() is formatted as <issuer>|<subject>, so if we have a user in our database with a tokenIdentifier like "https://some-issuer-123.clerk.accounts.dev|user_abc123", we can "Act as a user" like this:
1{
2  subject: "user_abc123",
3  issuer: "https://some-issuer-123.clerk.accounts.dev"
4}
5
Summary
In this post we looked at how to test authenticated functions from the dashboard using the "Act as a user" feature, passing in values decoded from our JWT, or constructed to match some expected fields. As always, let us know in Discord what you think.
Convex is the backend platform with everything you need to build your full-stack AI project. Cloud functions, a database, file storage, scheduling, workflow, vector search, and realtime updates fit together seamlessly.