
Adding Personality to ChatGPT-3
Building with OpenAI's APIs is fun. By leveraging Convex to store your data and run server-side functions, you can have a GPT-powered app in no time.
This is a follow-up to Building a full-stack ChatGPT app, where we set up a Chat-GPT-like chat app using Convex as the backend. In that example, we used a fixed identity string. In this post we’ll look at how to store multiple personalities in the database and provide them in the chat, to enable changing personalities mid-conversation.
See the code here.
Convex is the reactive backend platform that keeps up with you and your agents. Database, functions, workflow, sync, search, file storage, and more. All TypeScript, zero glue.
To customize the identity you pass into ChatGPT, you can pass a “system” message to the OpenAI API. See more details on this API here. In our case, before having multiple identities, the code looks like this:
1const openaiResponse = await openai.createChatCompletion({
2  model: "gpt-3.5-turbo",
3  messages: [
4    {
5      role: "system",
6      content: instructions,
7    },
8    ...messages.map(({ body, author }) => ({
9      role: author,
10      content: body,
11    })),
12  ],
13});
14
Let’s store multiple identities in the Convex database and pick which one to use.
Adding and listing identities
Let’s make convex/identity.js:
1import { query, mutation } from "./_generated/server";
2
3export const list = query(async (ctx) => {
4  const identities = await ctx.db.query("identities").collect();
5  return identities.map((identity) => identity.name);
6});
7
8export const add = mutation(async (ctx, { name, instructions }) => {
9  const existing = await ctx.db
10    .query("identities")
11    .filter((q) => q.eq(q.field("name"), name))
12    .unique();
13  if (existing) {
14    await ctx.db.patch(existing._id, { instructions });
15  } else {
16    await ctx.db.insert("identities", { name, instructions });
17  }
18});
19
This will run on the server and list the identity names or allow you to add one. Before it adds one, it will check if it already exists and, if so, update it, so there aren’t duplicate names. Because of Convex’s transaction isolation (which is the strictest kind, called “serializable isolation”), we’ll never have duplicate identities with the same name, simply because we queried for that name first. Read more about that here.
Note that by only returning the identity names, we are hiding the instructions from the clients. This is a big difference between Convex and a platform like Firebase that gives you direct access to databases from the browser. By running code on the server, we can use code to limit what information is returned to clients.
UI for adding identities
Adding a UI to add an identity is similar to sending messages with an <AddIdentity /> component:
AddIdentity component
1function AddIdentity() {
2 const addIdentity = useMutation("identity:add");
3 const [newIdentityName, setNewIdentityName] = useState("");
4 const [newIdentityInstructions, setNewIdentityInstructions] = useState("");
5
6 return (
7 <form
8 onSubmit={async (e) => {
9 e.preventDefault();
10 await addIdentity({
11 name: newIdentityName,
12 instructions: newIdentityInstructions,
13 });
14 setNewIdentityName("");
15 setNewIdentityInstructions("");
16 }}
17 >
18 <input
19 value={newIdentityName}
20 onChange={(event) => setNewIdentityName(event.target.value)}
21 placeholder="Identity Name"
22 />
23 <textarea
24 value={newIdentityInstructions}
25 onChange={(event) => setNewIdentityInstructions(event.target.value)}
26 placeholder="GPT3 Instructions"
27 rows={2}
28 cols={40}
29 />
30 <input
31 type="submit"
32 value="Add Identity"
33 disabled={!newIdentityName || !newIdentityInstructions}
34 />
35 </form>
36 );
37}
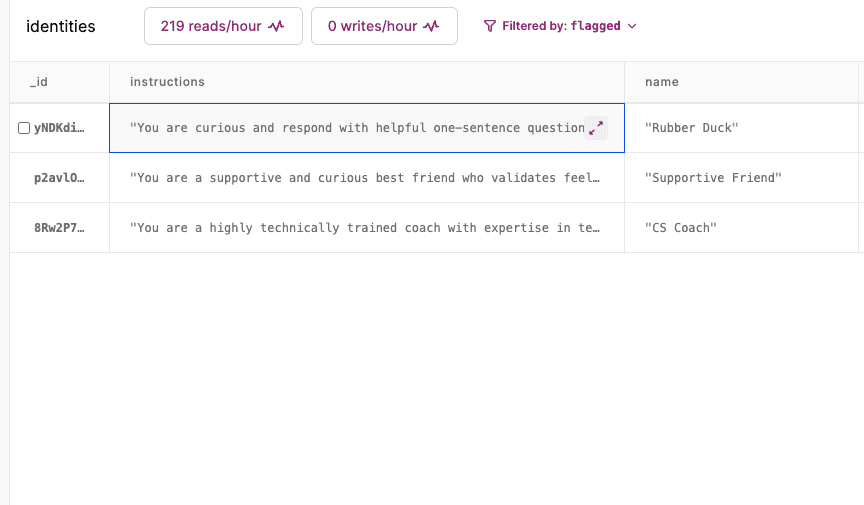
38Let’s add some identities. Some I like:
Rubber Duck
You are curious and respond with helpful one-sentence questions.
Supportive Friend
You are a supportive and curious best friend who validates feelings and experiences and will give advice only when asked for it. You give short responses and ask questions to learn more.
CS Coach
You are a highly technically trained coach with expertise in technology and best practices for developing software. Respond with concise, precise messages and ask clarifying questions when things are unclear.
Using an identity from the UI
To use an identity, we can add a select in our form to pick an identity, and pass that identity name in the openai:chat mutation:
1function App() {
2  const messages = useQuery(api.messages.list) || [];
3  const sendMessage = useAction("openai:chat");
4  const [newMessageText, setNewMessageText] = useState("");
5
6  const identities = useQuery(api.identity:list) || [];
7  const [identityName, setIdentityName] = useState("");
8  //...
9      <form
10        onSubmit={(e) => {
11          e.preventDefault();
12          setNewMessageText("");
13          sendMessage(newMessageText, identityName);
14        }}
15      >
16        <select
17          value={identityName}
18          onChange={(e) => setIdentityName(e.target.value)}
19        >
20          <option value={""} disabled={identityName}>
21            Select an identity
22          </option>
23          {identities.map((name) => (
24            <option key={name} value={name}>
25              {name}
26            </option>
27          ))}
28        </select>
29    //...
30
Looking up the identity
In our messages:send function, which runs on the server, we can accept the new identityName and look up the identity’s instructions to pass to ChatGPT:
1export const send = internalMutation(async (ctx, { body, identityName }) => {
2  //...
3  const identity = await ctx.db
4    .query("identities")
5    .filter((q) => q.eq(q.field("name"), identityName))
6    .unique();
7  if (!identity) throw new Error("Unknown identity: " + identityName);
8  const botMessageId = await ctx.db.insert("messages", {
9    author: "assistant",
10    identityId: identity._id,
11  });
12  //...
13  return { messages, botMessageId, instructions: identity.instructions };
14
Two things to note:
- We search for the identity by name. If there were a lot of them, we’d use an index, but for small tables doing a filter is just fine.
- We’re storing the
identityIdinto the bot’s message, so we can later know which identity responded to each message.
We can also pass the instructions for each bot message, by looking up the instructions if there is an identityId:
1await Promise.all(
2    messages.map(async (msg) => {
3      if (msg.identityId) {
4        msg.instructions = (await ctx.db.get(msg.identityId)).instructions;
5      }
6    })
7  );
8
We look up each identity by doing ctx.db.get in a separate async function, and use Promise.all to wait for the result of each of the async functions.
All together, send now looks like:
1export const send = internalMutation(async (ctx, { body, identityName }) => {
2  await ctx.db.insert("messages", {
3    body,
4    author: "user",
5  });
6  const identity = await ctx.db
7    .query("identities")
8    .filter((q) => q.eq(q.field("name"), identityName))
9    .unique();
10  if (!identity) throw new Error("Unknown identity: " + identityName);
11  const botMessageId = await db.insert("messages", {
12    author: "assistant",
13    identityId: identity._id,
14  });
15  const messages = await ctx.db
16    .query("messages")
17    .order("desc")
18    .filter((q) => q.neq(q.field("body"), undefined))
19    .take(10);
20  messages.reverse();
21  await Promise.all(
22    messages.map(async (msg) => {
23      if (msg.identityId) {
24        msg.instructions = (await ctx.db.get(msg.identityId)).instructions;
25      }
26    })
27  );
28  return { messages, botMessageId, instructions: identity.instructions };
29});
30
Passing the identity to ChatGPT
In our convex/openai.js chat function, we can now de-structure the instructions return instead of hard-coding it:
1export const chat = action(async (ctx, { body, identityName }) => {
2  const { messages, botMessageId, instructions } =
3    await ctx.runMutation(internal.messages.send, { body, identityName });
4  //...
5
Now the response will be a function of what messages have been sent, and what the identity’s instructions are.
To also give GPT context on what its identity was for previous messages, we can sprinkle system messages into the messages we pass to the API:
1const gptMessages = [];
2let lastInstructions = null;
3for (const { body, author, instructions } of messages) {
4  if (instructions && instructions !== lastInstructions) {
5    gptMessages.push({
6      role: "system",
7      content: instructions,
8    });
9    lastInstructions = instructions;
10  }
11  gptMessages.push({ role: author, content: body });
12}
13if (instructions !== lastInstructions) {
14  gptMessages.push({
15    role: "system",
16    content: instructions,
17  });
18  lastInstructions = instructions;
19}
20const openaiResponse = await openai.createChatCompletion({
21  model: "gpt-3.5-turbo",
22  messages: gptMessages,
23});
24
The goal here is to remind GPT what identity it had for each message it sent. This API is new, so I bet there’s a lot of tweaking we can do with the prompts here to make it work better. For instance, maybe we should be telling it “Ignore previous system instructions for the following messages. Now act like this: (new instructions)”. If you get something working in a better way, let me know in Discord!
Showing the identity’s name instead of “assistant” in the UI
Currently, all the messages in the UI say “assistant” - let’s show the identity we named by looking up the identities dynamically. Convex supports relationships in this way.
When listing our messages, we can look up the identity’s name to return. In convex/messages.ts:
1export const list = query(async (ctx) => {
2  const messages = await ctx.db.query("messages").take(20);
3  return Promise.all(
4    messages.map(async (message) => {
5      if (message.identityId) {
6        const identity = await ctx.db.get(message.identityId);
7        message.identityName = identity.name;
8      }
9      return message;
10    })
11  );
12});
13
We look up each identity by doing db.get in a separate async function, and use Promise.all to return the result of each of the functions as an array. This is the common pattern for doing join-like behavior with Convex. This way you can execute the reads in parallel but do all your business logic and lookups in JavaScript.
On the client, we can now show the identityName if it’s defined instead of just the author in App.jsx:
1<span>{message.identityName ?? message.author}: </span>
2
And we can also default the chat identity to be the last-used identity message, when you load the page with a useEffect:
1useEffect(() => {
2  if (identities.length && !identityName) {
3    const lastMessage = messages[messages.length - 1];
4    if (lastMessage && identities.indexOf(lastMessage.identityName) !== -1) {
5      setIdentityName(lastMessage.identityName);
6    } else {
7      setIdentityName(identities[0]);
8    }
9  }
10}, [messages, identities, identityName]);
11
Summary
We’ve now added the ability to change the instructions to ChatGPT on how to respond, so we can have a conversation and be changing the identity mid-stream. See the code here. Note, that code has some more features than just what we’ve done in this post.
Convex is the reactive backend platform that keeps up with you and your agents. Database, functions, workflow, sync, search, file storage, and more. All TypeScript, zero glue.